User Guide · v1.3.3
Forms, entries and the emails they send
Flexa FormFlow puts a form builder and a visual email builder in one plugin. A field you add to a form becomes a token you can drop into the notification email, so the message people receive matches the data they sent. This guide covers the free plugin. The paid add-on has its own page.
Free or Pro?
Everything below is in the free plugin. Pro is an add-on installed beside it: nothing you build here moves or breaks when you add it.
| Area | Free plugin | Pro adds |
|---|---|---|
| Forms | Every field type, conditional logic, honeypot, rate limits, CAPTCHA. | Multi-step forms with a progress bar, a phone field with country flags, a country picker. |
| Emails | Drag-and-drop blocks, patterns, a global header and footer, test sends. | Synced blocks, custom variables, brand color themes, file attachments. |
| Languages | One version per email. | A version per language, picked from the reader’s locale. |
| WooCommerce | Order emails redesigned, order and customer tokens. | Order fields, shipment tracking, product blocks and offers from your other plugins, plus the emails those plugins send. |
| Workflows | Send an email, call a webhook, set the entry status, note the entry. | A CRM and marketing connector node. |
Installation
Getting started
FormFlow runs on any WordPress site. WooCommerce is optional: with it active you get extra email blocks and the WooCommerce email designs, without it everything else works the same.
- Install the plugin from
Plugins > Add New > Upload Plugin, or copy theflexa-formflowfolder intowp-content/plugins/. - Activate it on the Plugins screen.
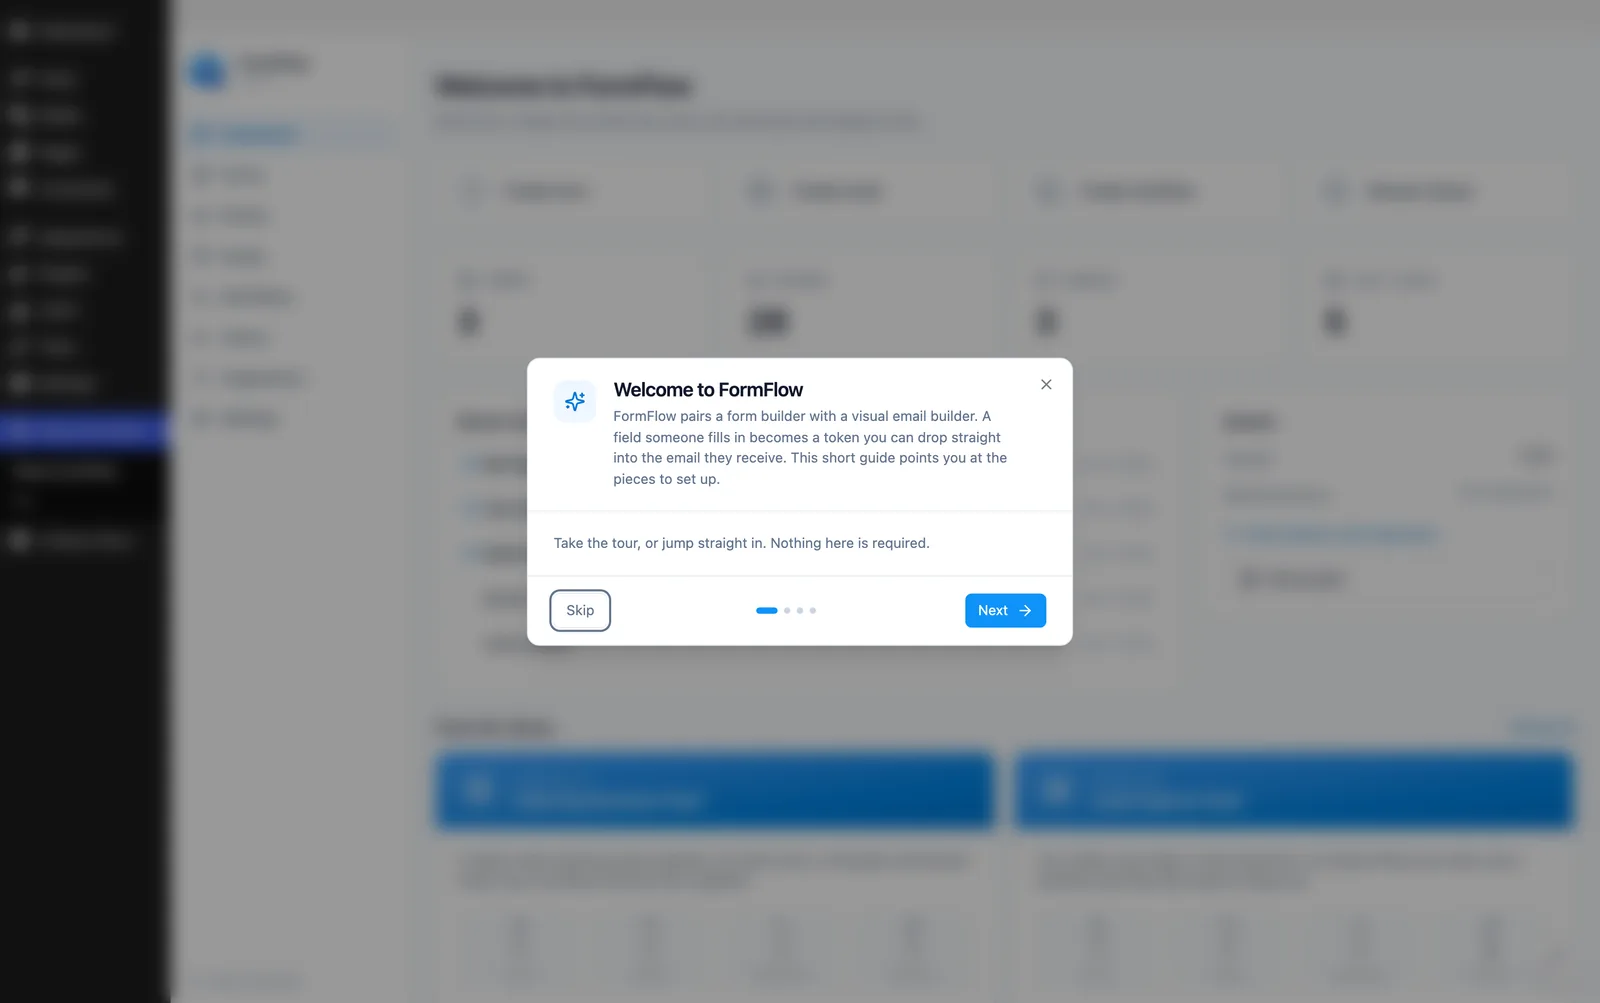
- Open Flexa FormFlow in the admin menu. A short welcome guide offers to set your brand color and build a first form.
- Create a form, copy its shortcode, and paste it into any post or page.
Delivery is your site's job
wp_mail(). It does not run its own mail server. If mail from your site is unreliable, add an SMTP or delivery plugin (Flexa MailBridge, or any SMTP plugin) and FormFlow will follow it.Orientation
The Dashboard
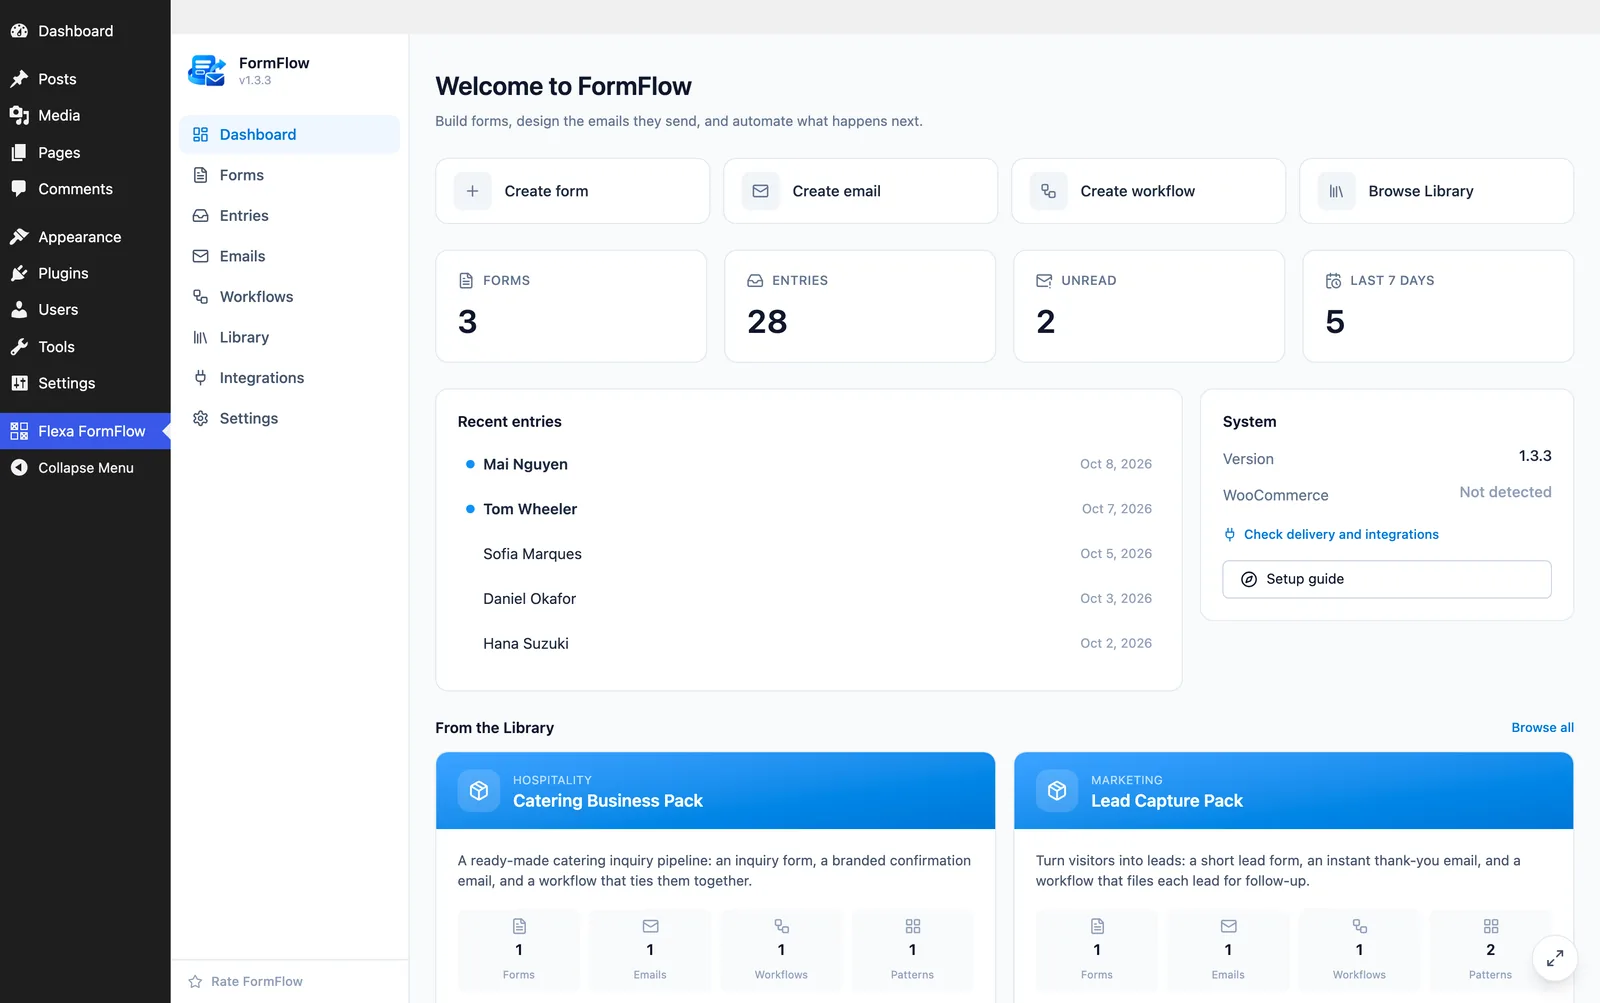
The admin menu has one entry, and the app inside it has eight sections.
| Section | What lives there |
|---|---|
| Dashboard | Counts, recent entries, and warnings such as a published form whose CAPTCHA has no keys. |
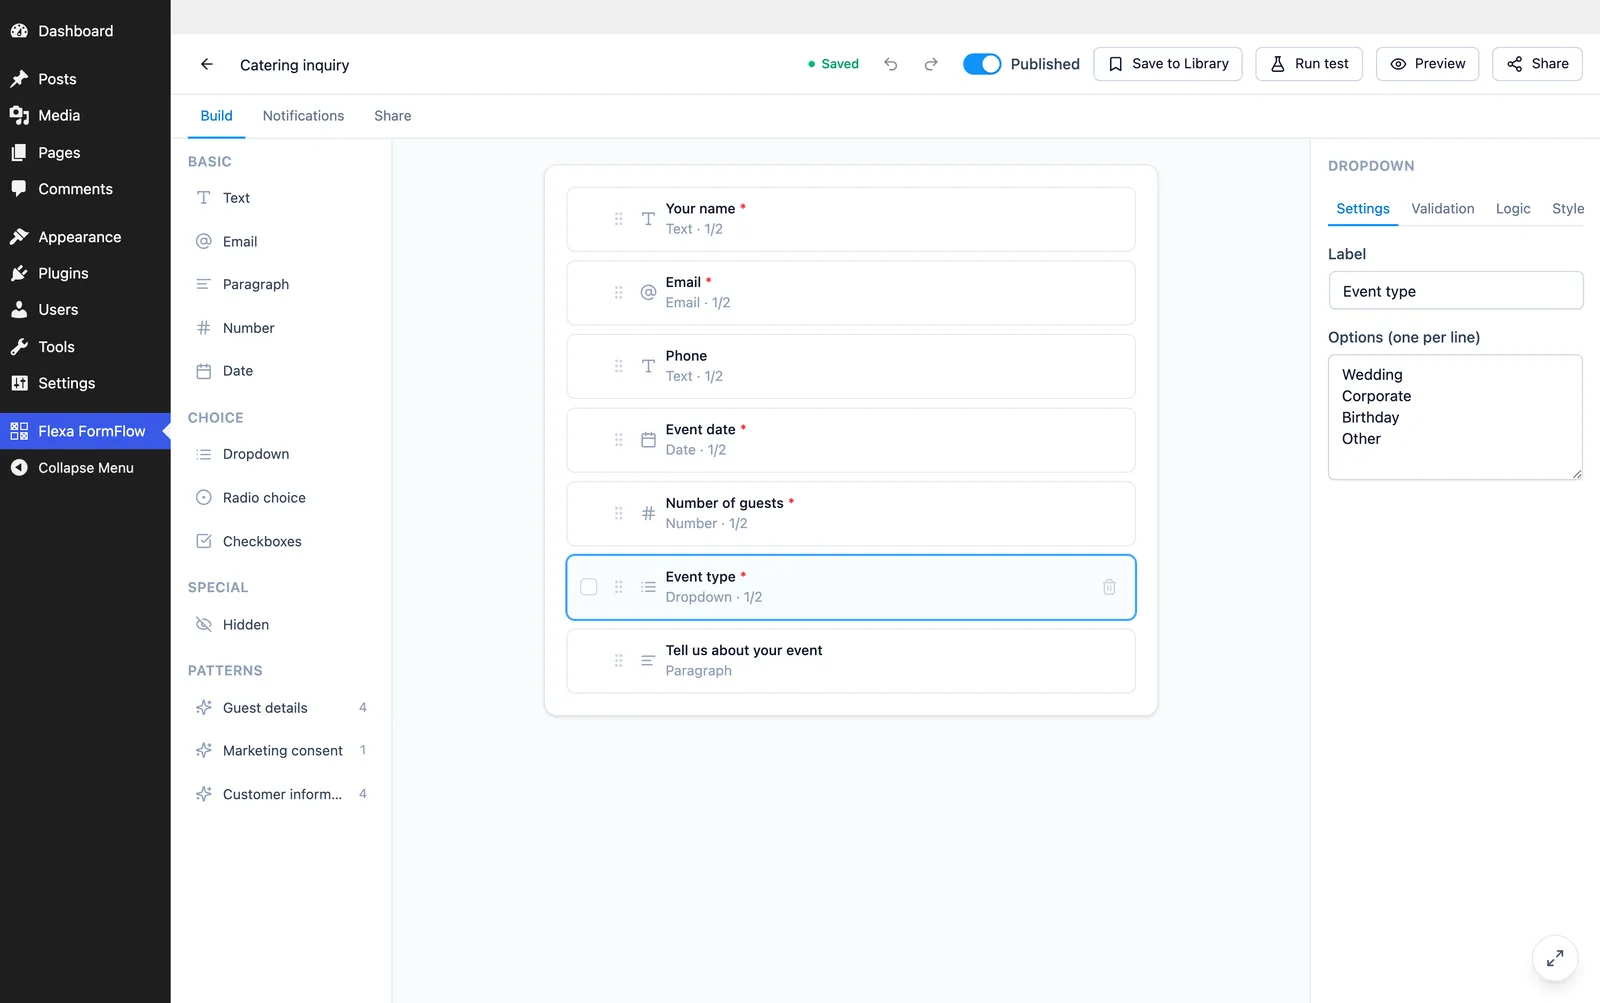
| Forms | The forms list and the drag-and-drop builder. |
| Entries | Every submission, filterable by form and by read status. |
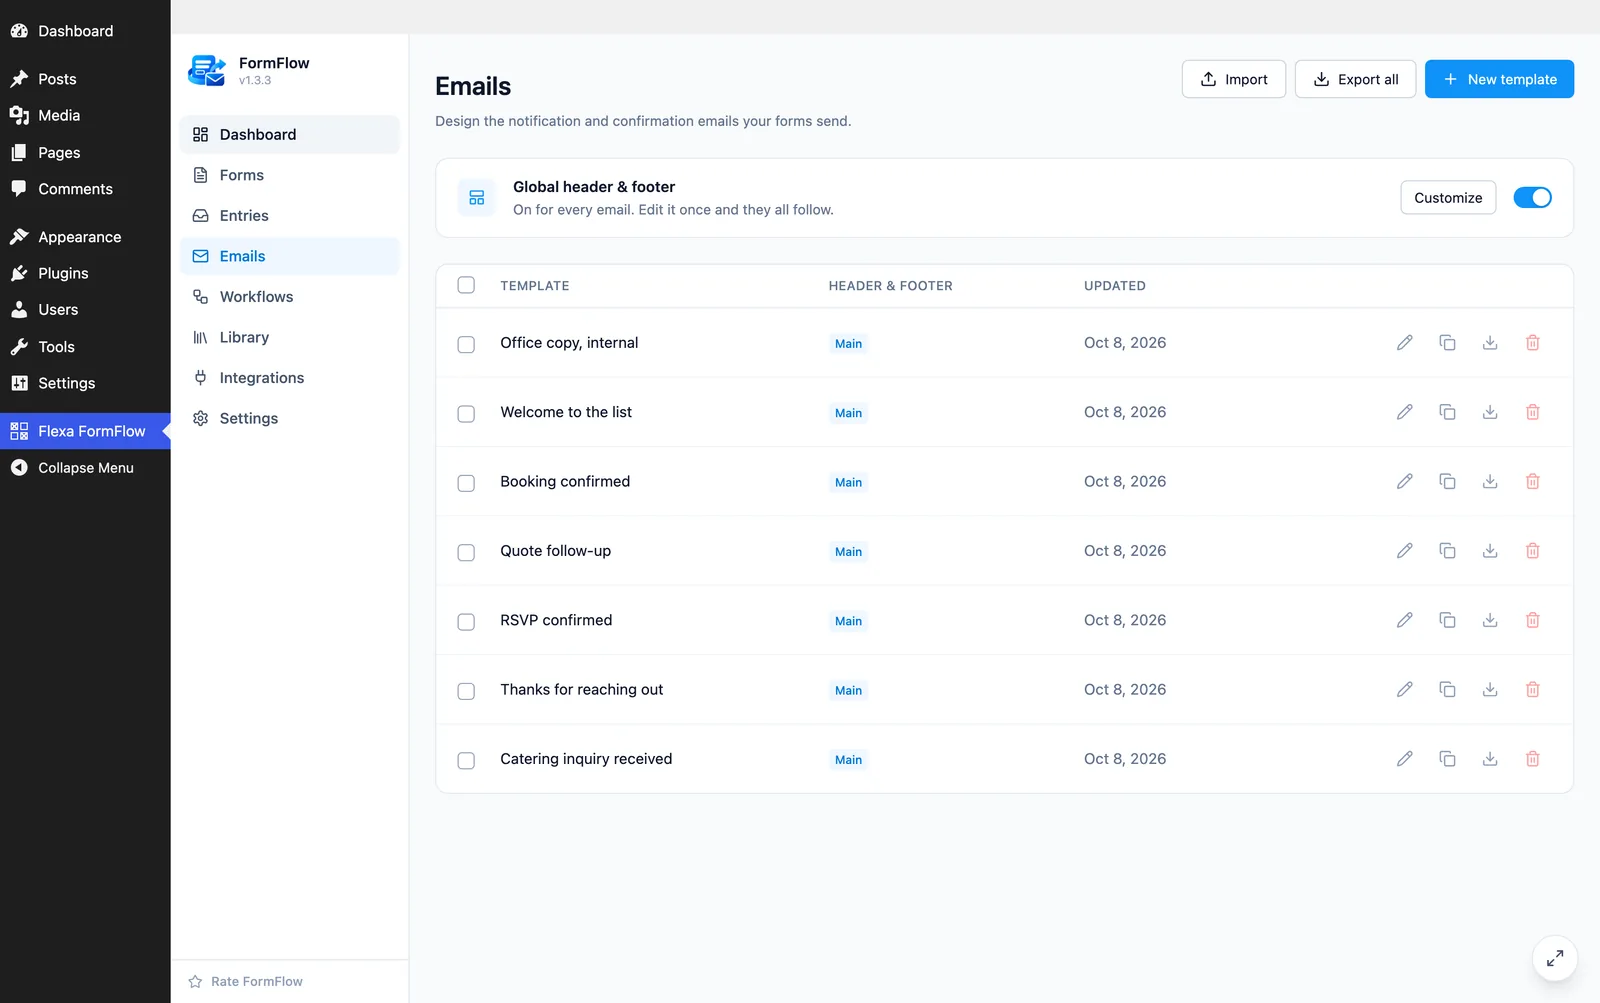
| Emails | Email templates, the visual editor, the global header and footer, and WooCommerce email designs. |
| Workflows | Trigger, condition and action chains that run when a form is submitted. |
| Library | Ready-made forms, emails, workflows and industry packs, plus your own saved items. |
| Integrations | Connections to other services. The CRM card belongs to Pro. |
| Settings | Brand color and email defaults, spam protection, CAPTCHA keys, AI provider, uninstall behavior. |
Forms
Build a form
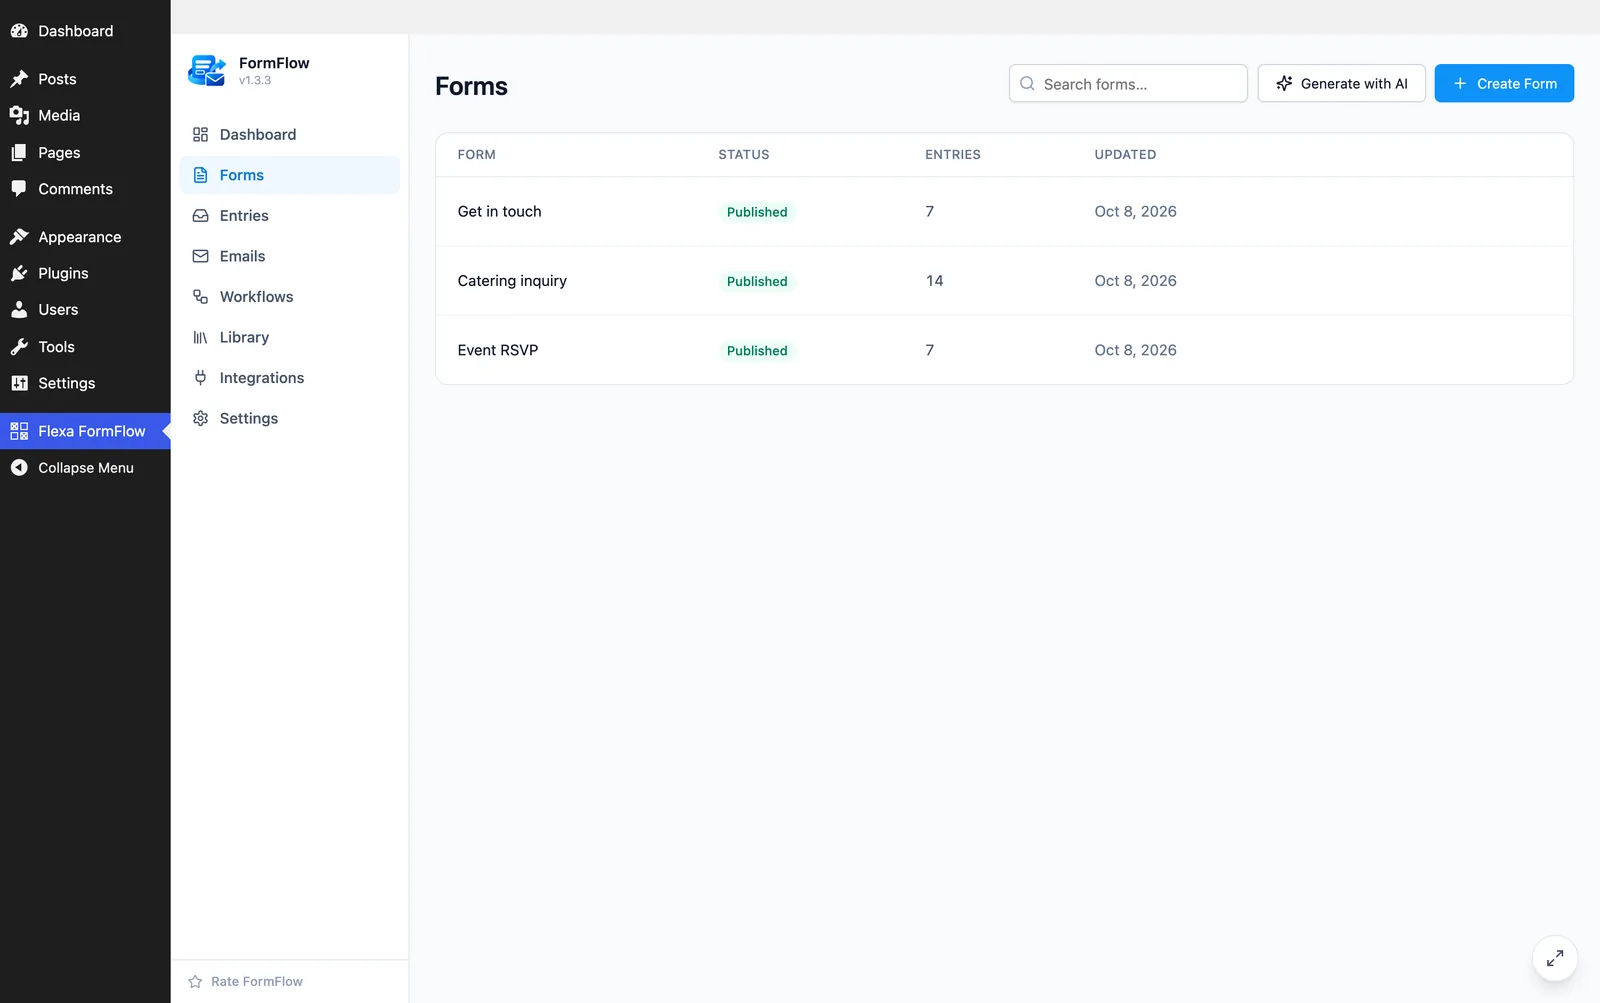
The builder has three columns: the palette of field types on the left, the canvas in the middle, and the inspector for the selected field on the right.
- Go to Forms and click New form. Give it a title; that title is what the admin notification refers to and what
{form_title}resolves to. - Drag a field from the palette onto the canvas. Drag fields up and down to reorder them.
- Select a field and edit it in the inspector. It has four tabs: Settings (label, placeholder, and the choices for a dropdown, radio or checkbox field), Validation (required or not), Logic, and Style. A hidden field swaps its placeholder box for a Value box, since nobody types into it.
- Set the field width per breakpoint. Two fields at half width sit side by side on desktop and stack on a phone, with no CSS to write.
- Open Form settings for the submit button label, the success message, the CAPTCHA choice, and the two emails the form sends.
- Use Preview to see the form the way a visitor does, at desktop and phone width, then publish it.
Draft and published
Forms
Field types
| Field | Notes |
|---|---|
| Text | One line of text. |
| Checked as an address, both in the browser and on the server. | |
| Paragraph | Multi-line text. |
| Dropdown | One choice from a list. |
| Radio | One choice, all options visible. |
| Checkbox | One box to tick, or a set of them. |
| Number | Digits only, with the browser’s number input. |
| Date | A date picker. |
| Hidden | A value carried with the submission that the visitor does not see. |
Pro adds a Phone field with country flags and calling codes, a Country field, and a Step item that splits a long form into pages. Those are covered in the Pro guide.
Phone, country and multi-step forms
FormFlow Pro adds a phone field with country flags and calling codes, a country field, and steps that split a long form into pages with a progress bar and per-step validation.
Forms
Show and hide fields
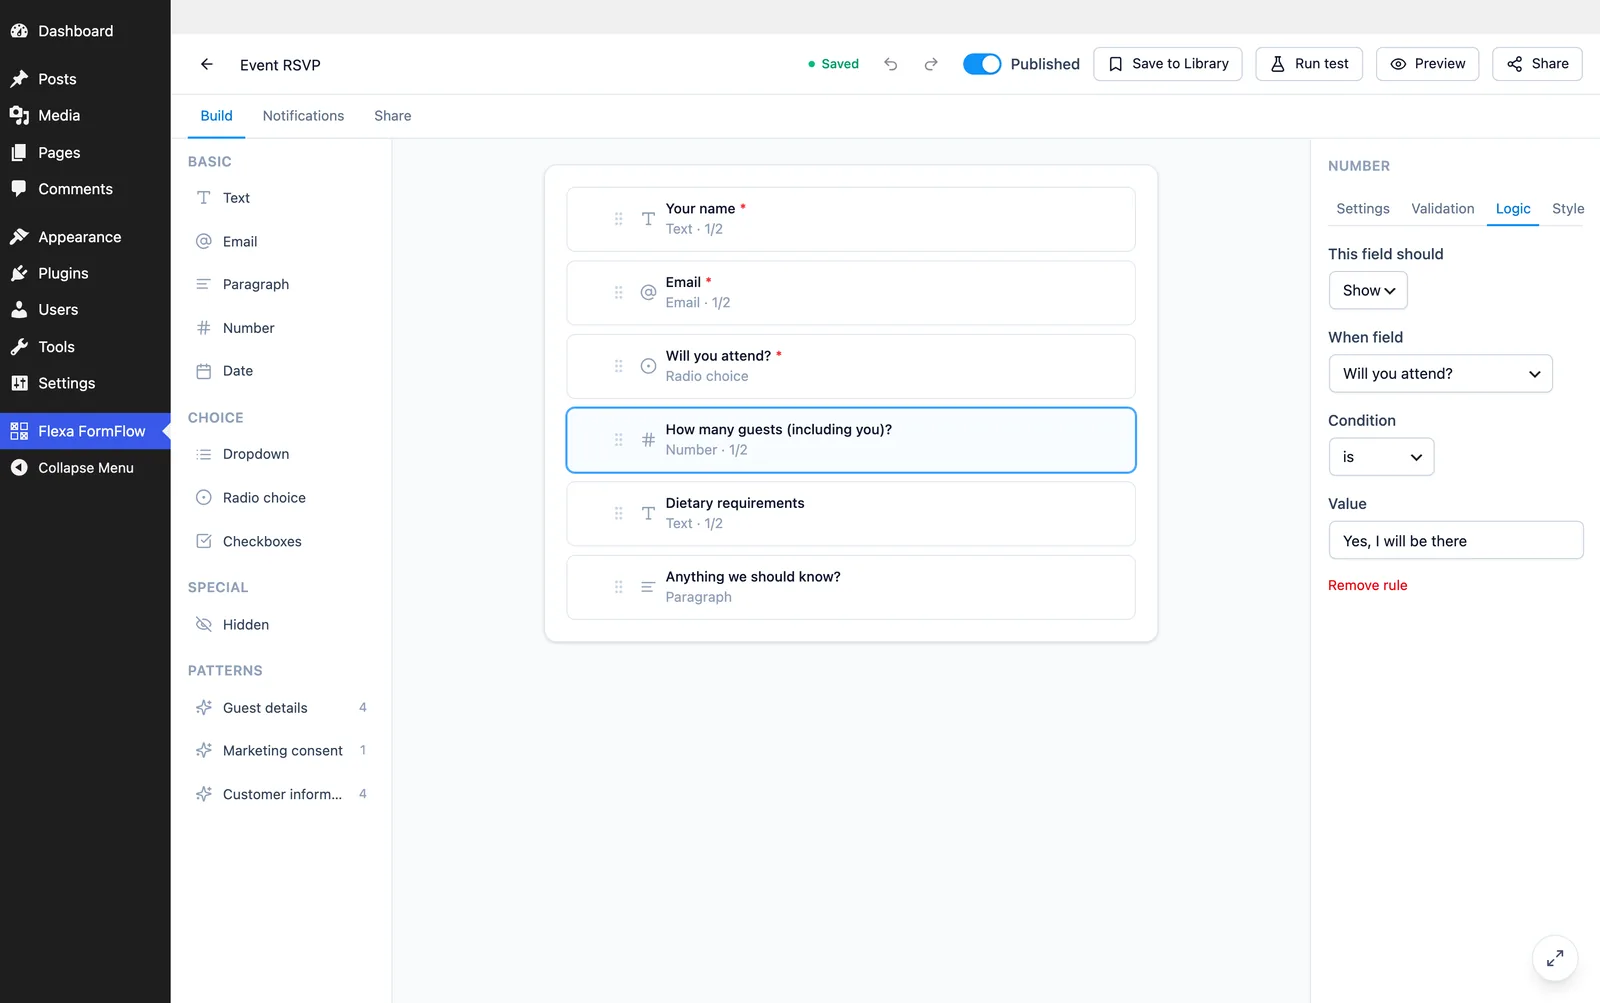
Any field can depend on the answer to another one. Pick the field to watch, the comparison, and the value; the field then appears only when the rule matches.
Rules run in the browser as the visitor types, and again on the server when the form is submitted. A field that is hidden by its own rule is not required, so a conditional required field cannot block a submission the visitor has no way to fix.
Forms
Put the form on a page
Two ways, same result.
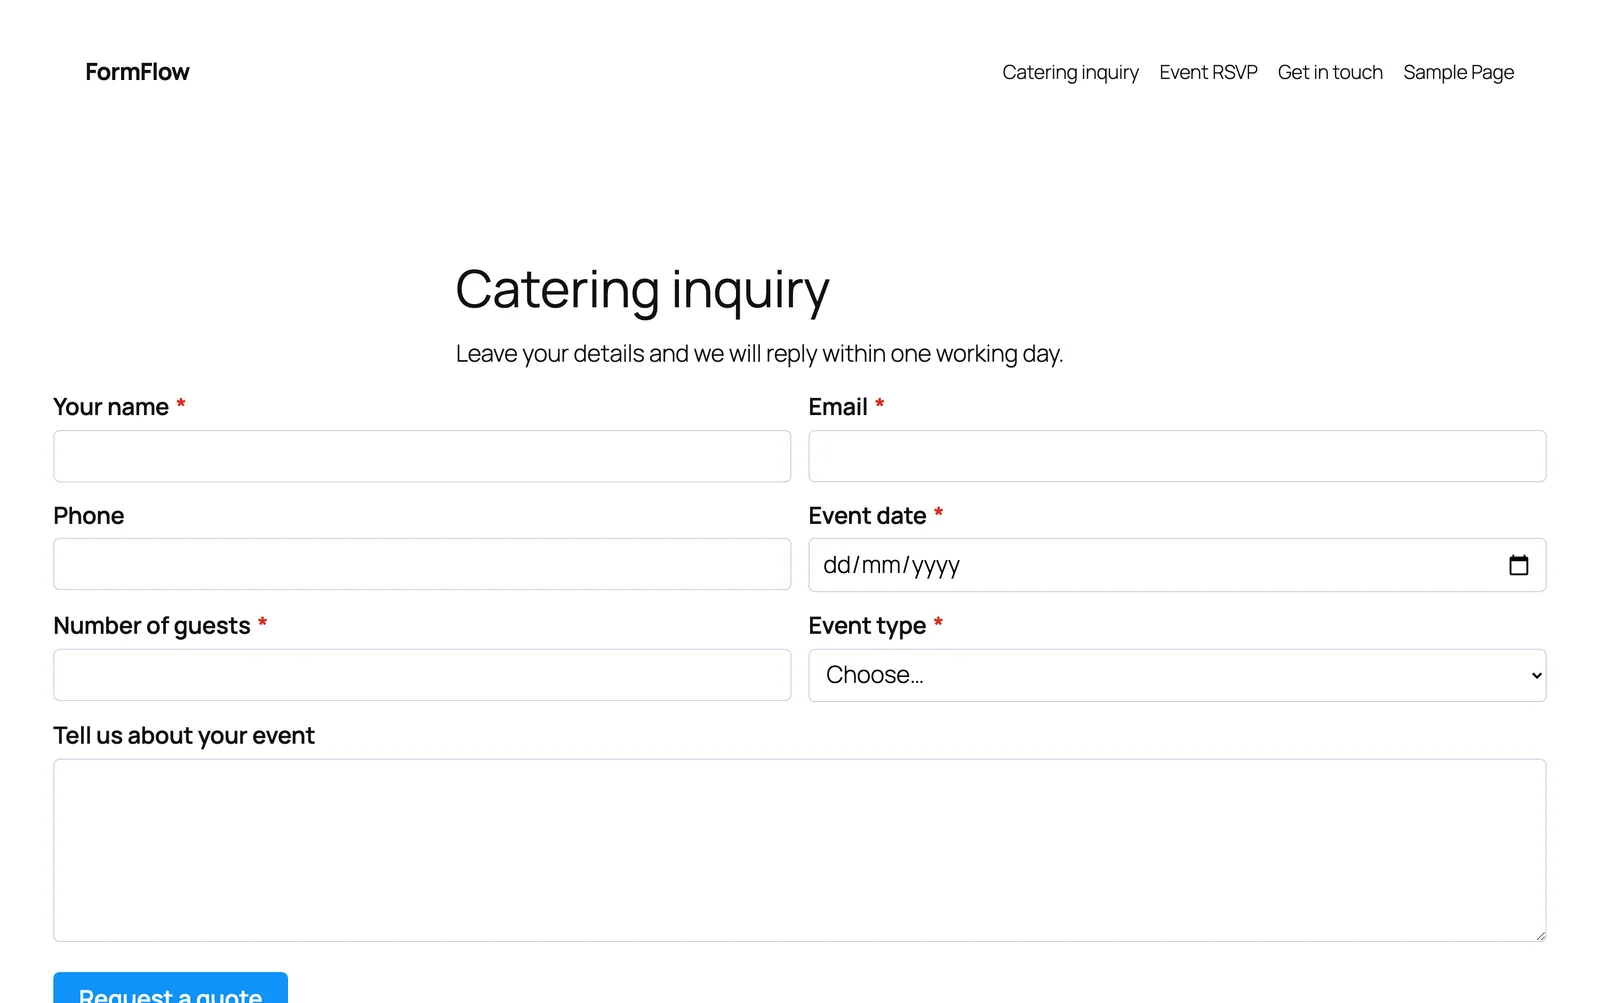
[flexa_formflow id="123"]Or add the FormFlow Form block in the editor and pick the form from the dropdown. The block panel lists published forms by title.
The front-end form loads one small stylesheet and one script. The builder's preview loads the same stylesheet, so what you see in the preview is what visitors get.
Forms
Spam protection
Every form is protected the moment it goes live. There is no switch to forget.
| Layer | What it does |
|---|---|
| Honeypot | A field real visitors never fill in. A filled one is dropped. |
| Timing check | A submission that arrives faster than a human could type is refused. |
| Rate limit | Counts submissions per visitor over time and refuses a flood. |
| CAPTCHA (optional) | Cloudflare Turnstile or Google reCAPTCHA v2, per form. |
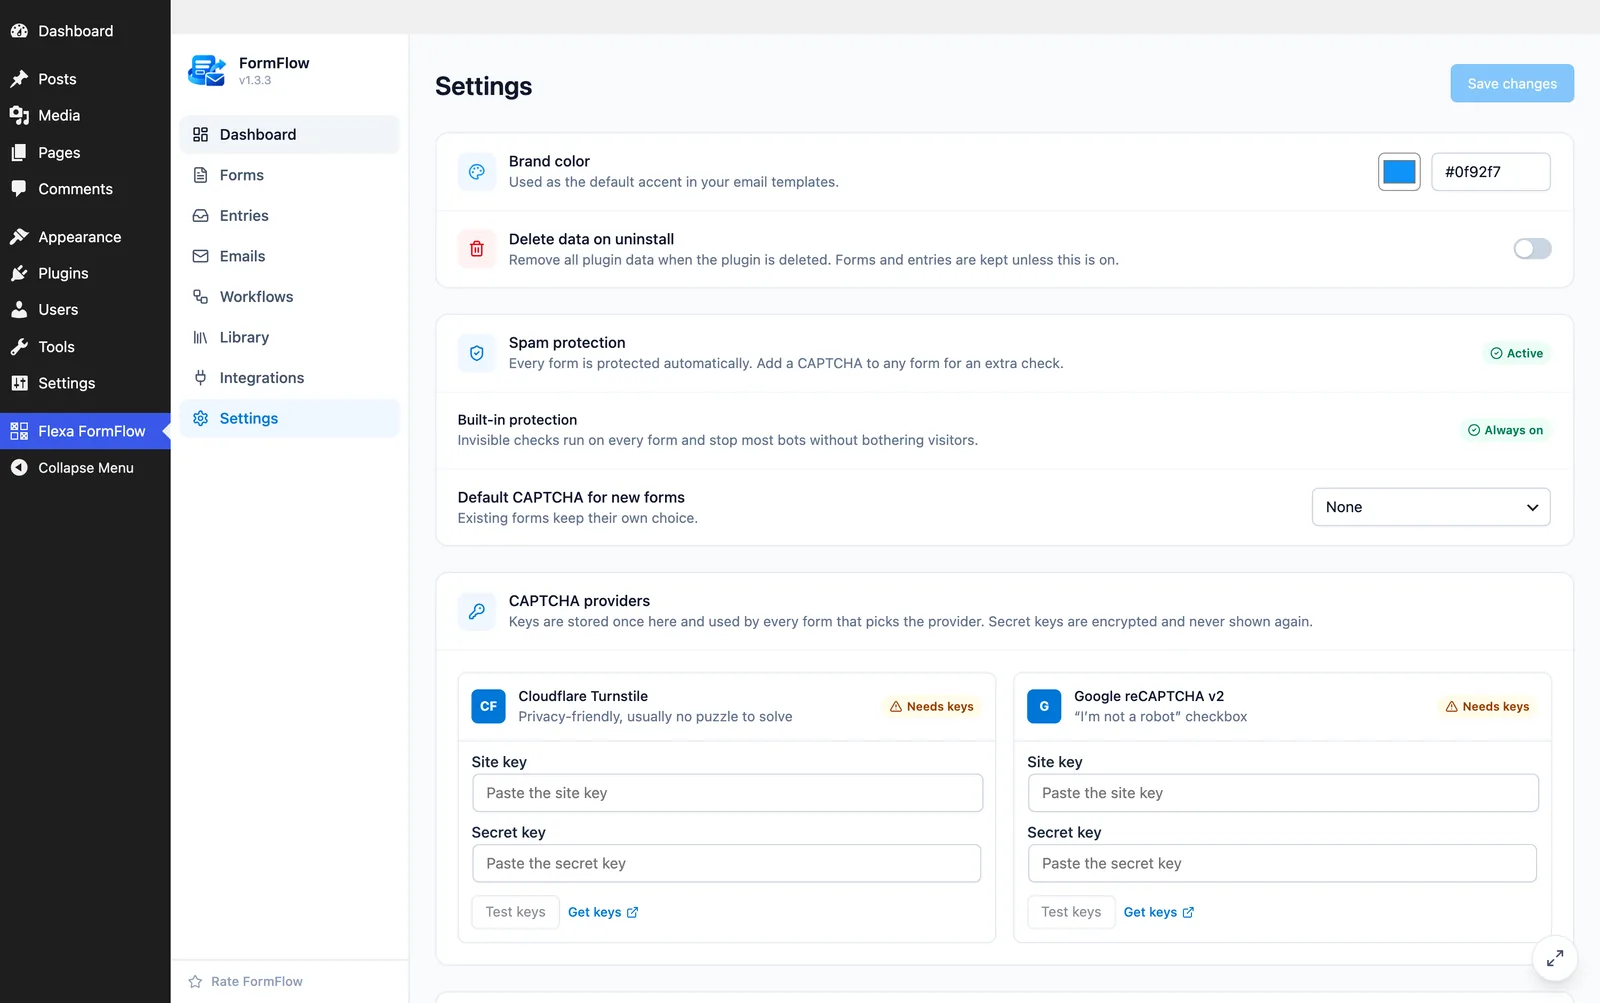
The first three are always on. To add a CAPTCHA, enter the provider keys once in Settings, then pick that provider on the form. Secret keys are stored encrypted, and Test keys confirms them without involving a visitor. Every answer is verified on your server before an entry is saved or an email is sent.
Keys first, then the form
Entries
Entries
Every submission is stored in your own database. Nothing is kept behind an external service.
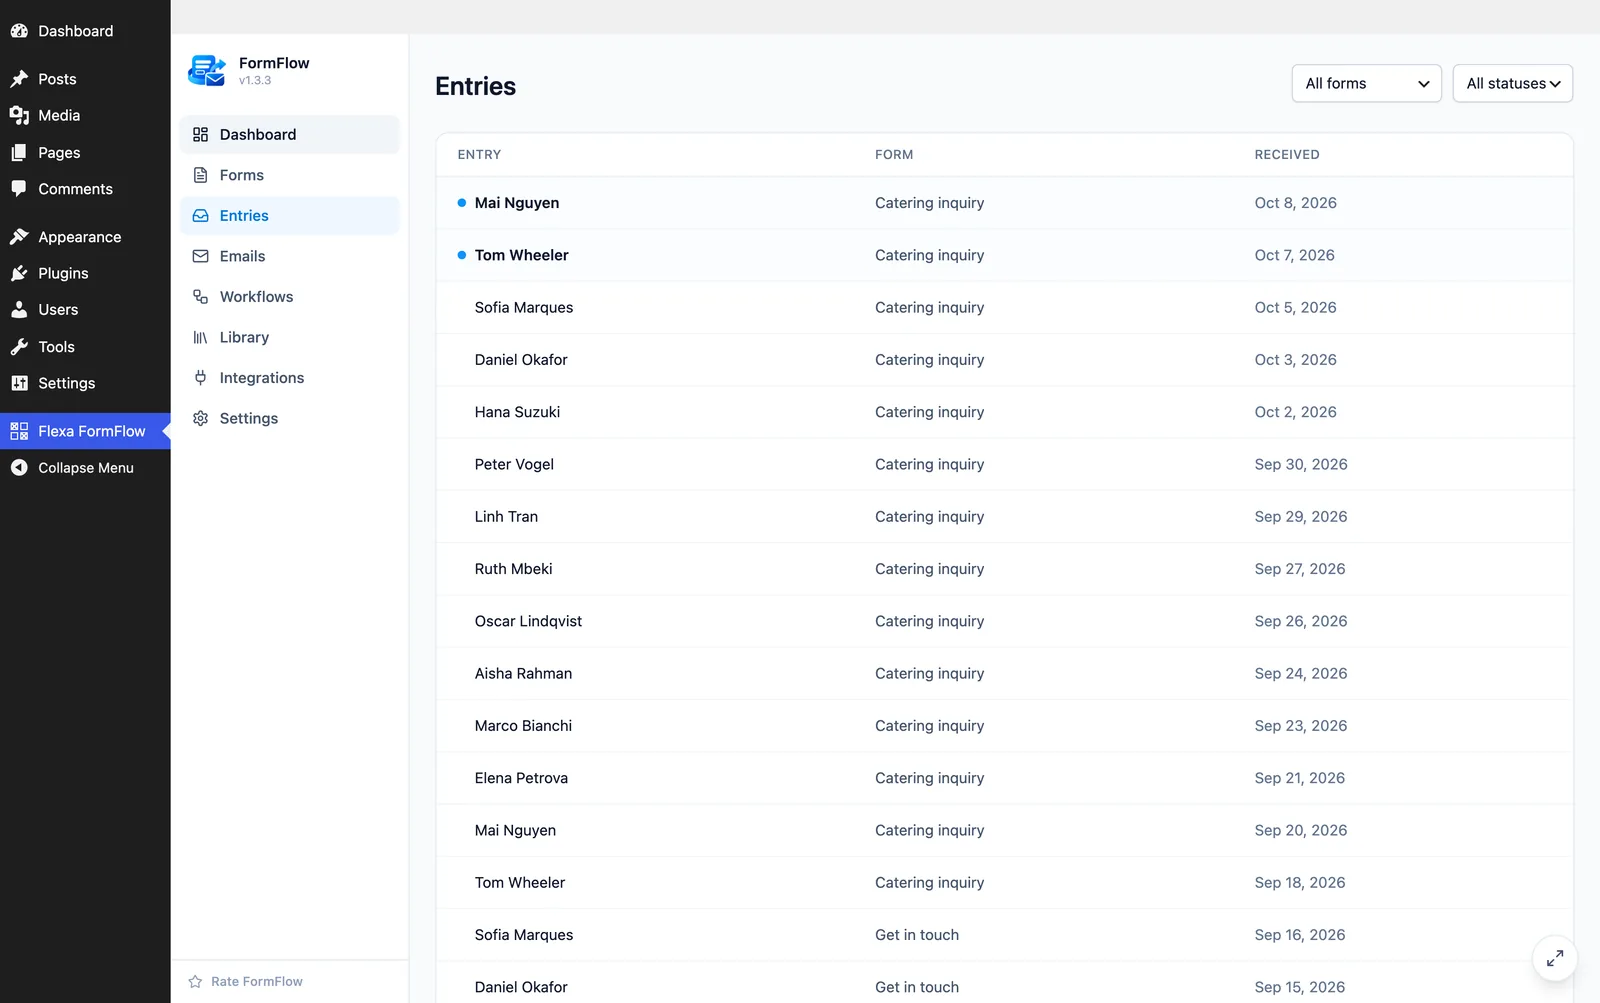
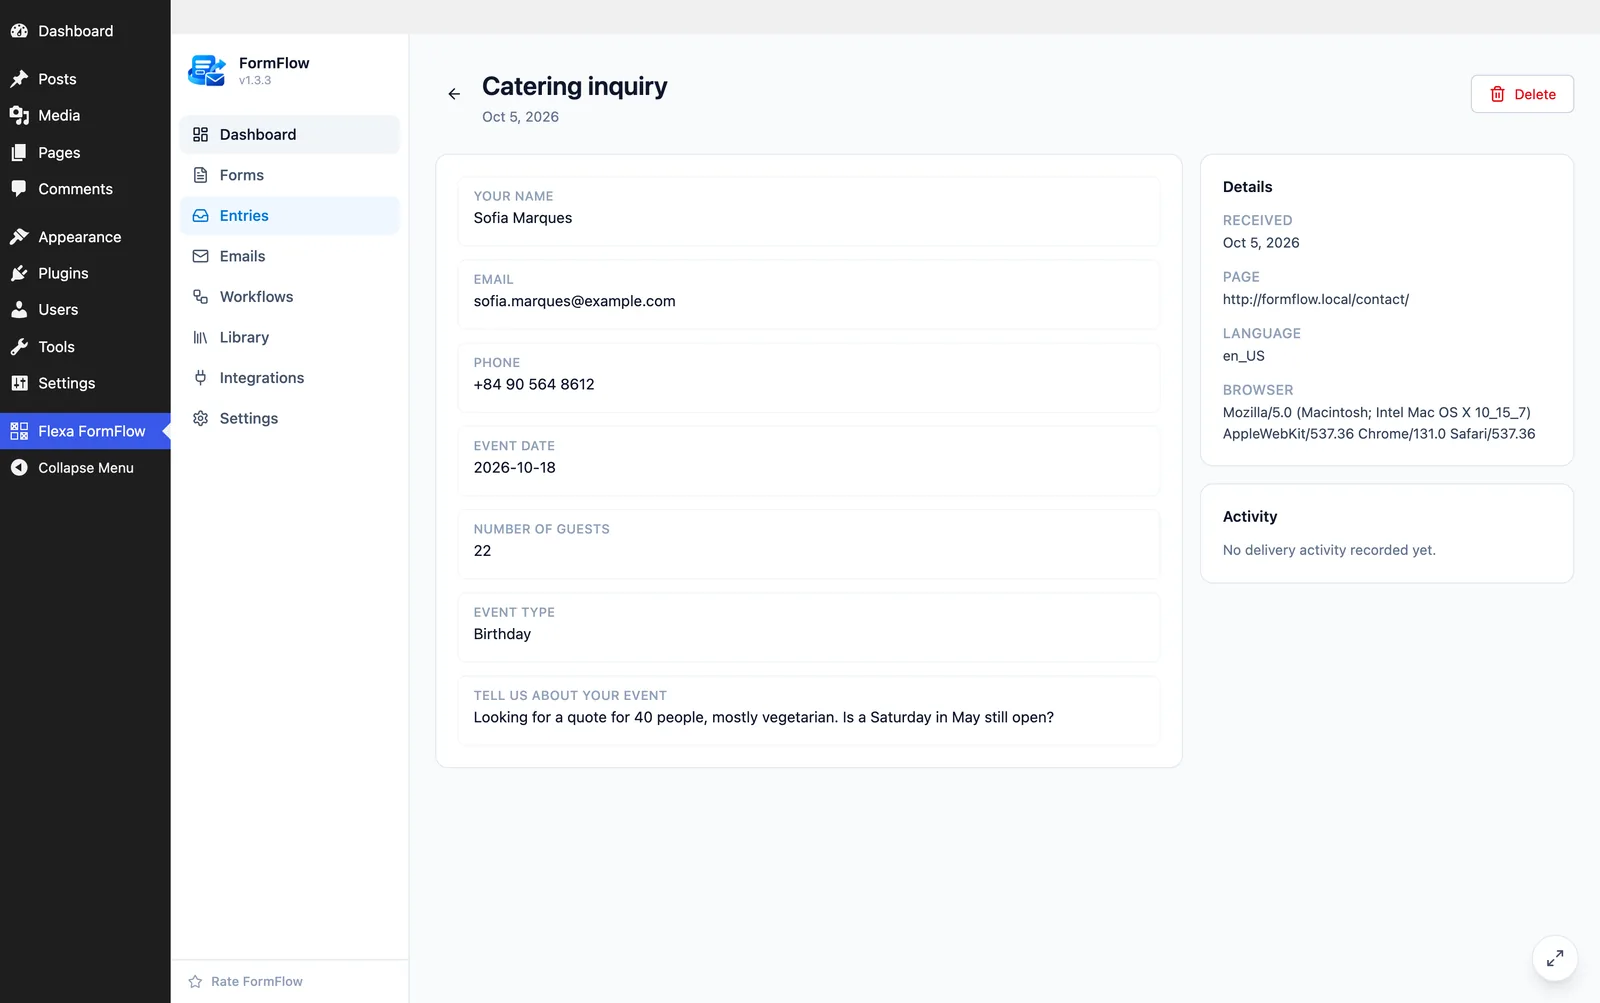
The Entries list filters by form and by read status. Clicking a row opens a peek panel beside the list; the detail view shows the whole submission with its date, the page it came from, and any notes a workflow added. Entries can be marked read or unread, and deleted.
Emails
Design the email
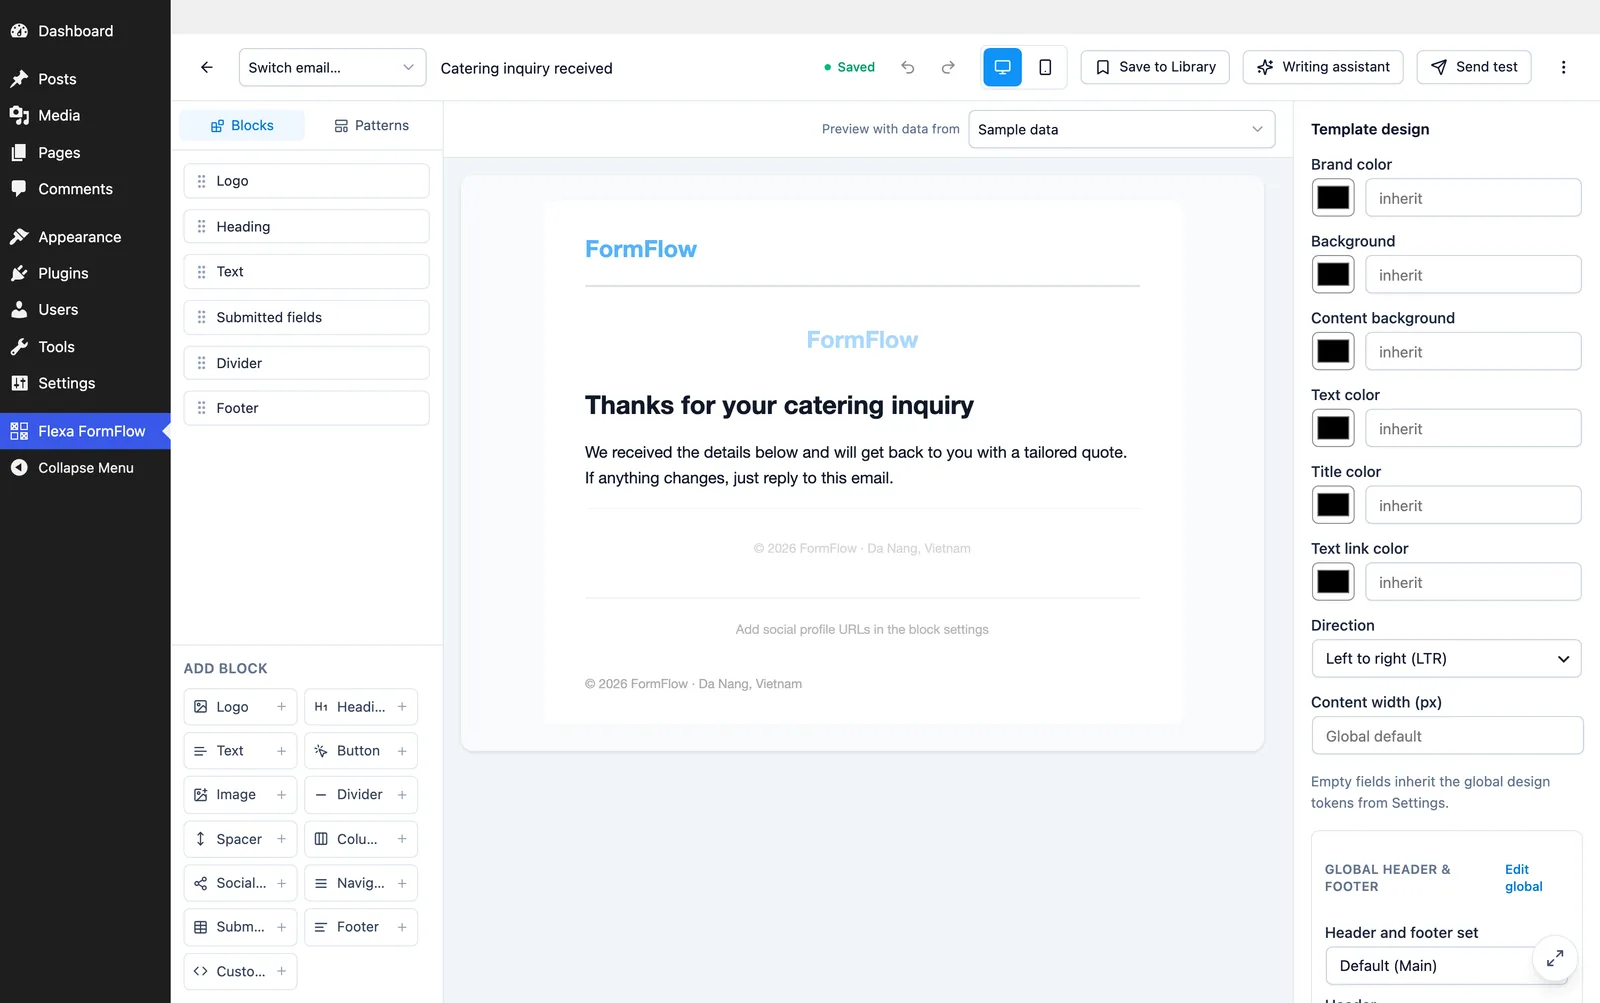
The email builder is a block editor that writes email-safe HTML. Blocks are dragged in from a palette, selected on the canvas, and styled in the side panel.
| Block | Use |
|---|---|
| Heading, Text | Copy, edited in WordPress’s own visual editor with only the formatting an email can keep. |
| Button | A call to action with its own colors and width. |
| Image, Logo | Picked from the Media Library, or any URL. The logo follows your site logo. |
| Divider, Spacer | Rules and vertical space. |
| Columns | Two or more columns that stack on a phone. |
| Fields table | The whole submission as a label and value table. |
| Order details, Addresses | WooCommerce order lines and billing or shipping addresses, on stores. |
Insert form data with tokens. {field:ID} prints one answer, and the Dynamic data list offers the rest without any syntax to memorize:
| Token | Resolves to |
|---|---|
{field:ID} | One answer from the submission. |
{form_title} | The form’s title. |
{entry_id} | The entry number. |
{entry_date} | When it was submitted, in the site format. |
{page_url} | The page the form was submitted from. |
{site_title} | Site name. |
{site_tagline} | Site tagline. |
{site_url} | Site address. |
{site_logo_url} | The site logo, for an image block. |
{admin_email} | The site admin address. |
{year} | The current year, for a footer. |
Each block has a ⋮ menu: duplicate, copy, paste after this one, copy styles, paste styles, remove. A copied block or a copied style pastes into another email too. Arrows beside the selected block move it one place, including inside a column.
Set global styles once (brand color, page and content background, text color, font, content width) and every template follows them. Preview at desktop and phone width, pick a real entry or a real order to preview against, and send yourself a test before going live.
The editor saves itself as you go, a moment after you stop typing, and the header says whether the draft is saved, saving or still unsaved. If a save fails you get a toast saying so, and leaving the screen stores the last change before the editor closes. The ⋮ menu beside Send test holds Export as JSON and Reset to default; the reset asks what to start from, suggests the design this template came from, says why, and can be undone.
Emails
Show a block only sometimes
Any block can carry conditions. The block is in the design, but a reader only sees it when their entry matches.
Select a block and open Visibility at the bottom of the inspector. Choose whether to match all or any of the rules, then add rules. A rule is one of the form’s fields, an operator, and a value to compare against. The block gets a Conditional badge once it has at least one rule.
| Operator | Matches when the answer… |
|---|---|
| is | equals the value exactly. |
| is not | differs from the value. |
| contains | has the value somewhere inside it. |
| does not contain | does not have the value inside it. |
| is empty | was left blank. No value to type. |
| is not empty | was filled in. No value to type. |
The field list comes from whichever form the Preview data source picker in the toolbar is set to, so pick the form first. One use: a thank-you email with a paragraph for Enquiry type is Support and a different one for Enquiry type is Sales, both in the same design.
The preview always shows everything
Emails
Patterns and global parts
Starting from a blank canvas is slow, so the editor ships a pattern library: ready-made headers, intros, banners, calls to action, galleries, offers and footers, plus order and shipping sections on WooCommerce stores.
Browse them by category or search, preview one at full size, insert it, and then edit it like any other blocks. Undo works on an inserted pattern.
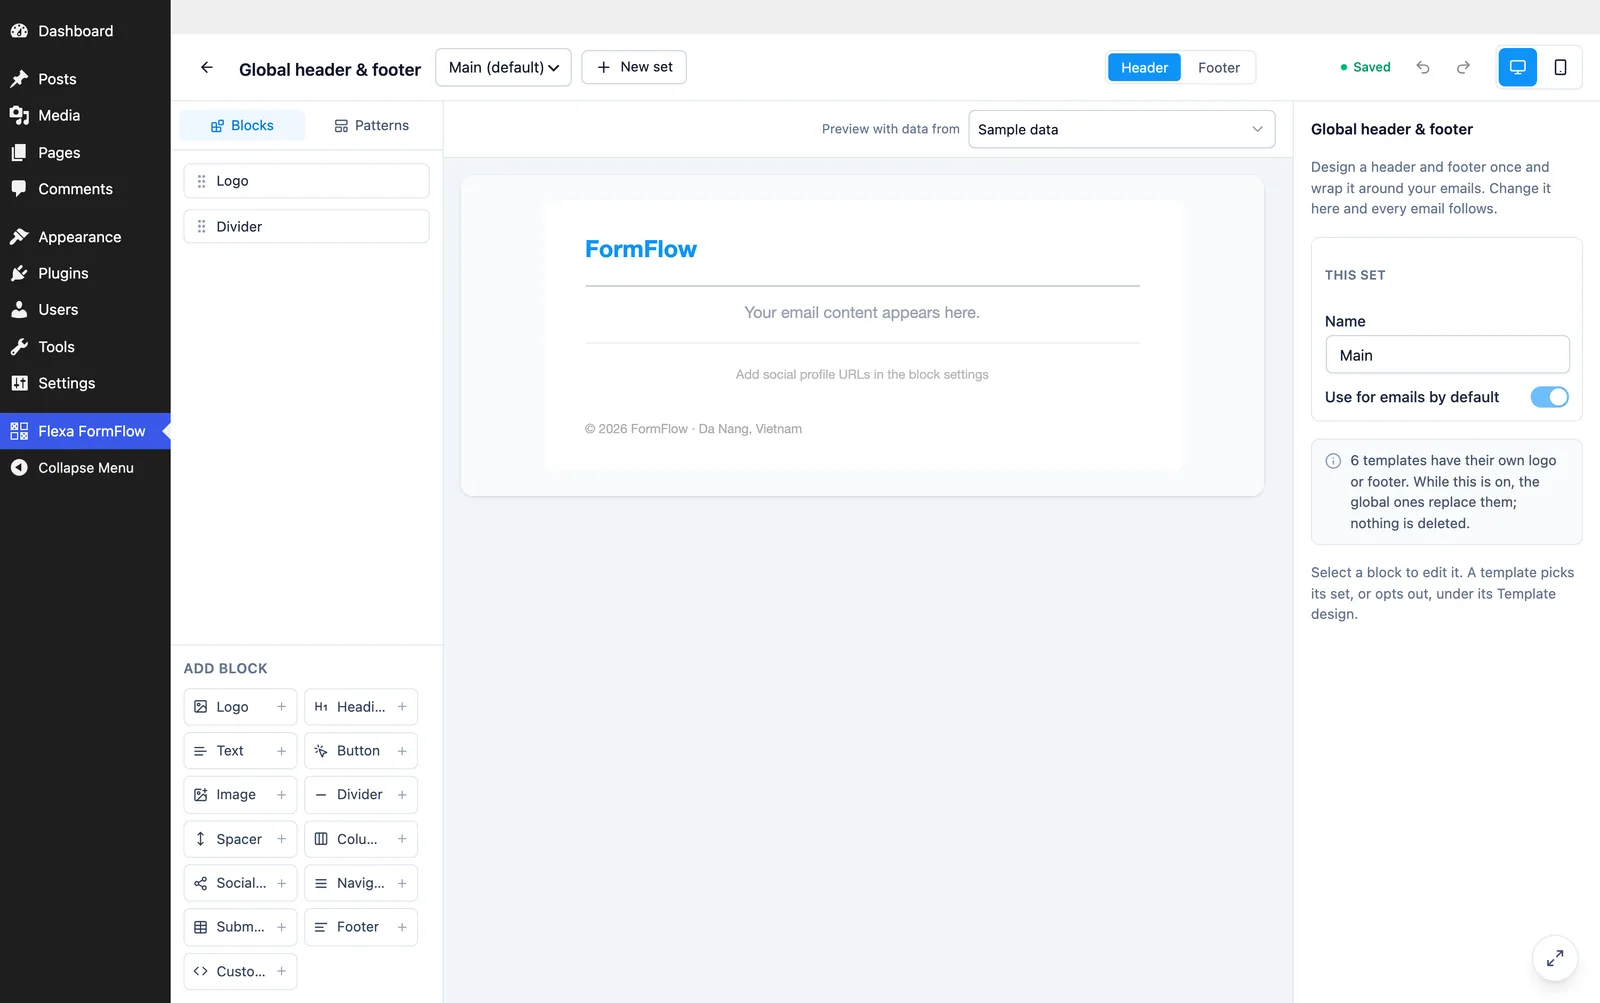
The global header and footer keeps branding in one place. Pick a ready-made set, then decide per email whether to use the global one, keep its own copy, or turn it off. Section backgrounds let neighboring blocks form one tinted band with no seam between them.
Templates can be saved to the library, exported as JSON (one or all of them), and imported on another site. An import warns about missing block types and images hosted elsewhere before it adds anything.
Emails
Which email a form sends
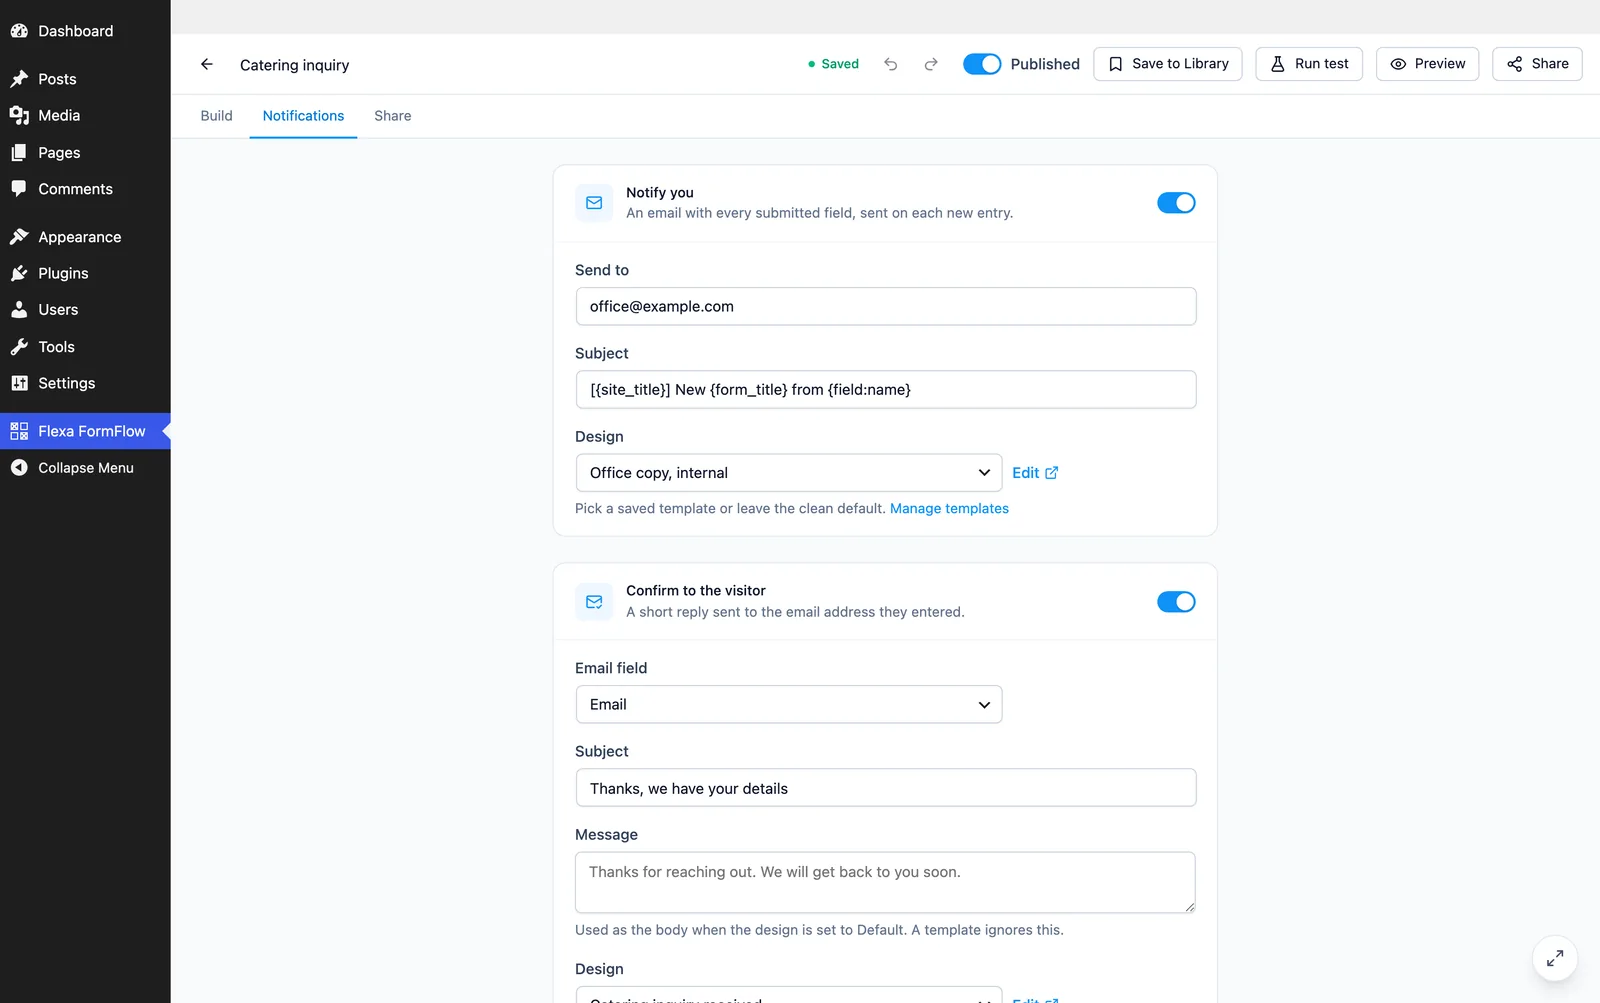
A form sends up to two messages, both set in Form settings, both optional.
| Message | Settings |
|---|---|
| Admin notification | Recipient (the site admin address when left empty), subject, and which template to use. |
| Confirmation to the submitter | Which email field to send to, subject, and which template to use. Nothing is sent when that field is empty or not an address. |
When no template is chosen, a clean default layout is used, so a form you built in two minutes still sends a readable email. Subjects accept the same tokens as the body.
Emails
WooCommerce emails
On a store the Emails screen gets a second tab. It lists the 17 WooCommerce transactional emails FormFlow can take over, from New order through to Reset password, so you design them with the same builder instead of WooCommerce's fixed template.
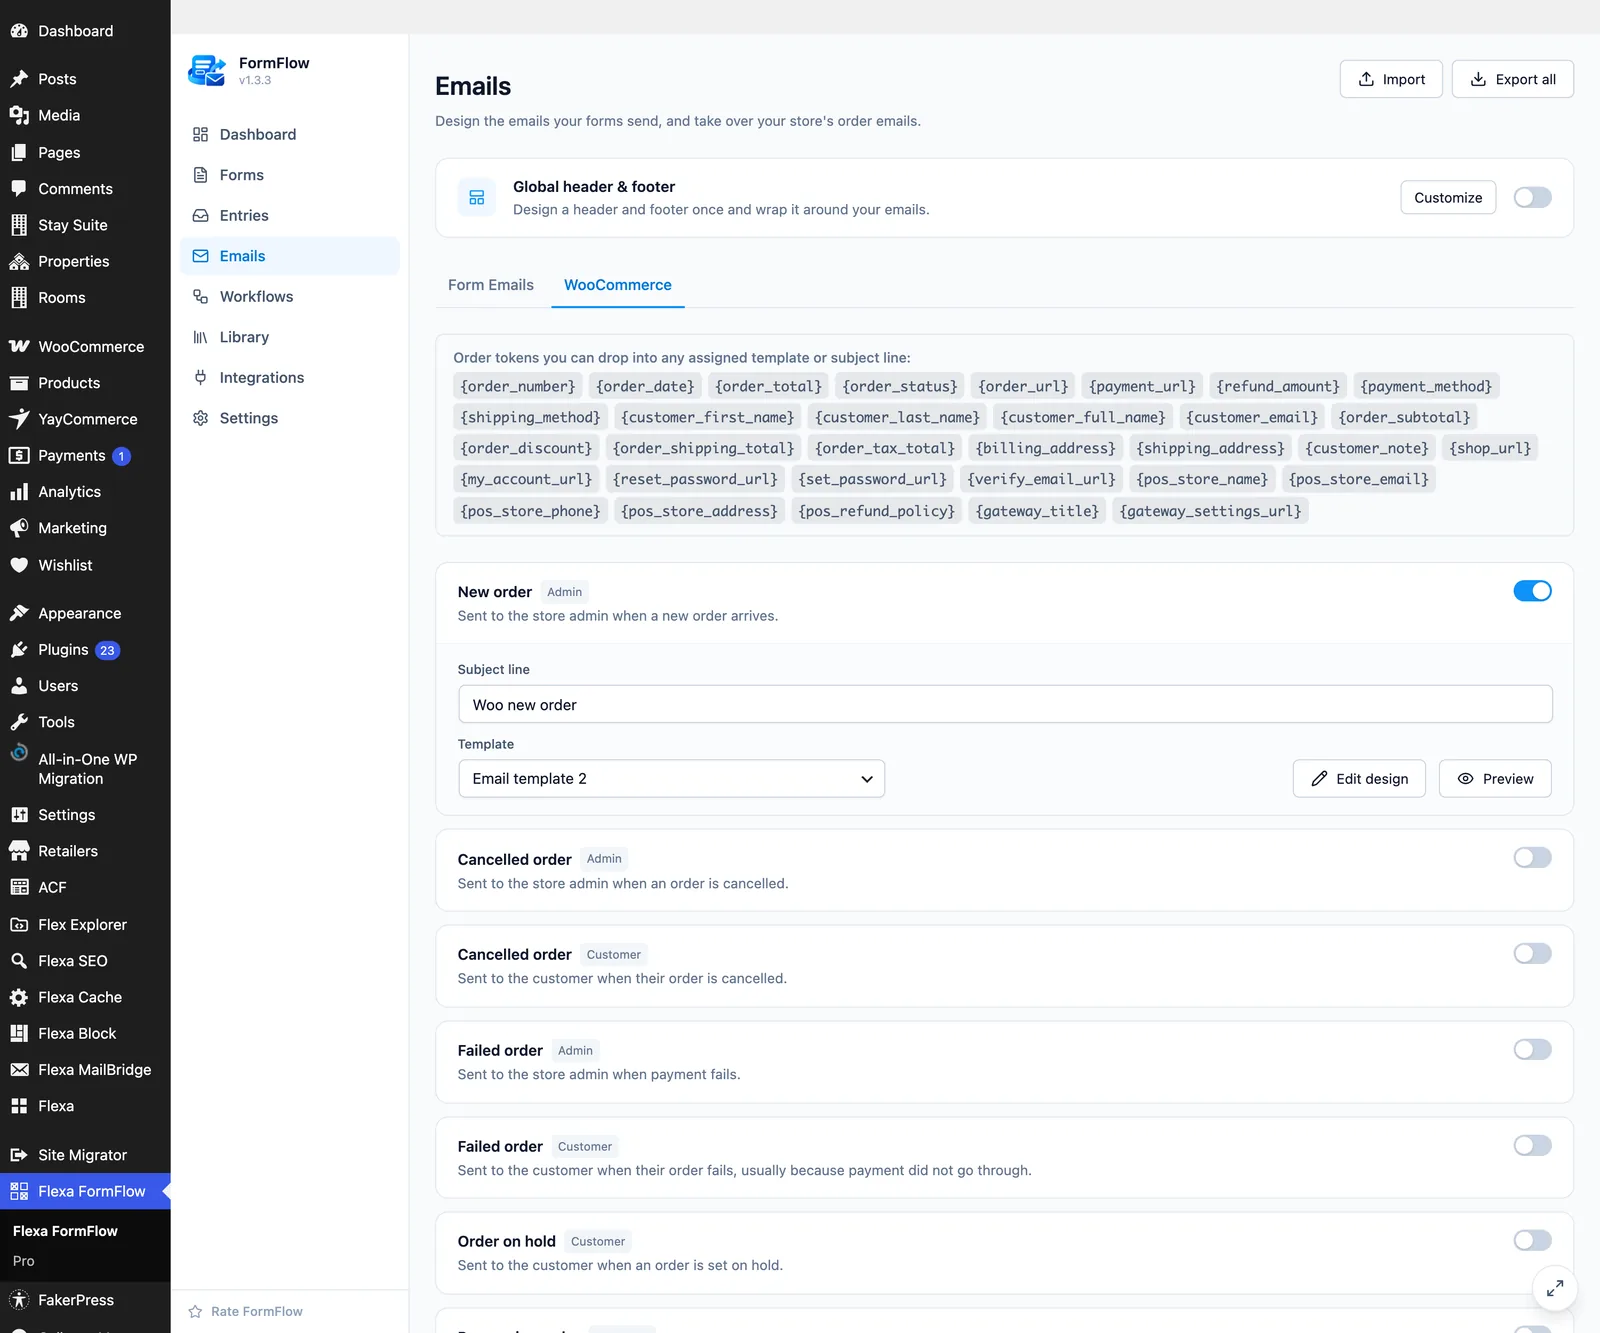
- Open Emails and switch to the WooCommerce tab.
- Flip the toggle on the email you want. FormFlow sends that one from then on. Flip it back and WooCommerce takes it over again, with nothing lost.
- Type a Subject line, or leave it blank to keep WooCommerce's own. Order tokens work here as well as in the body.
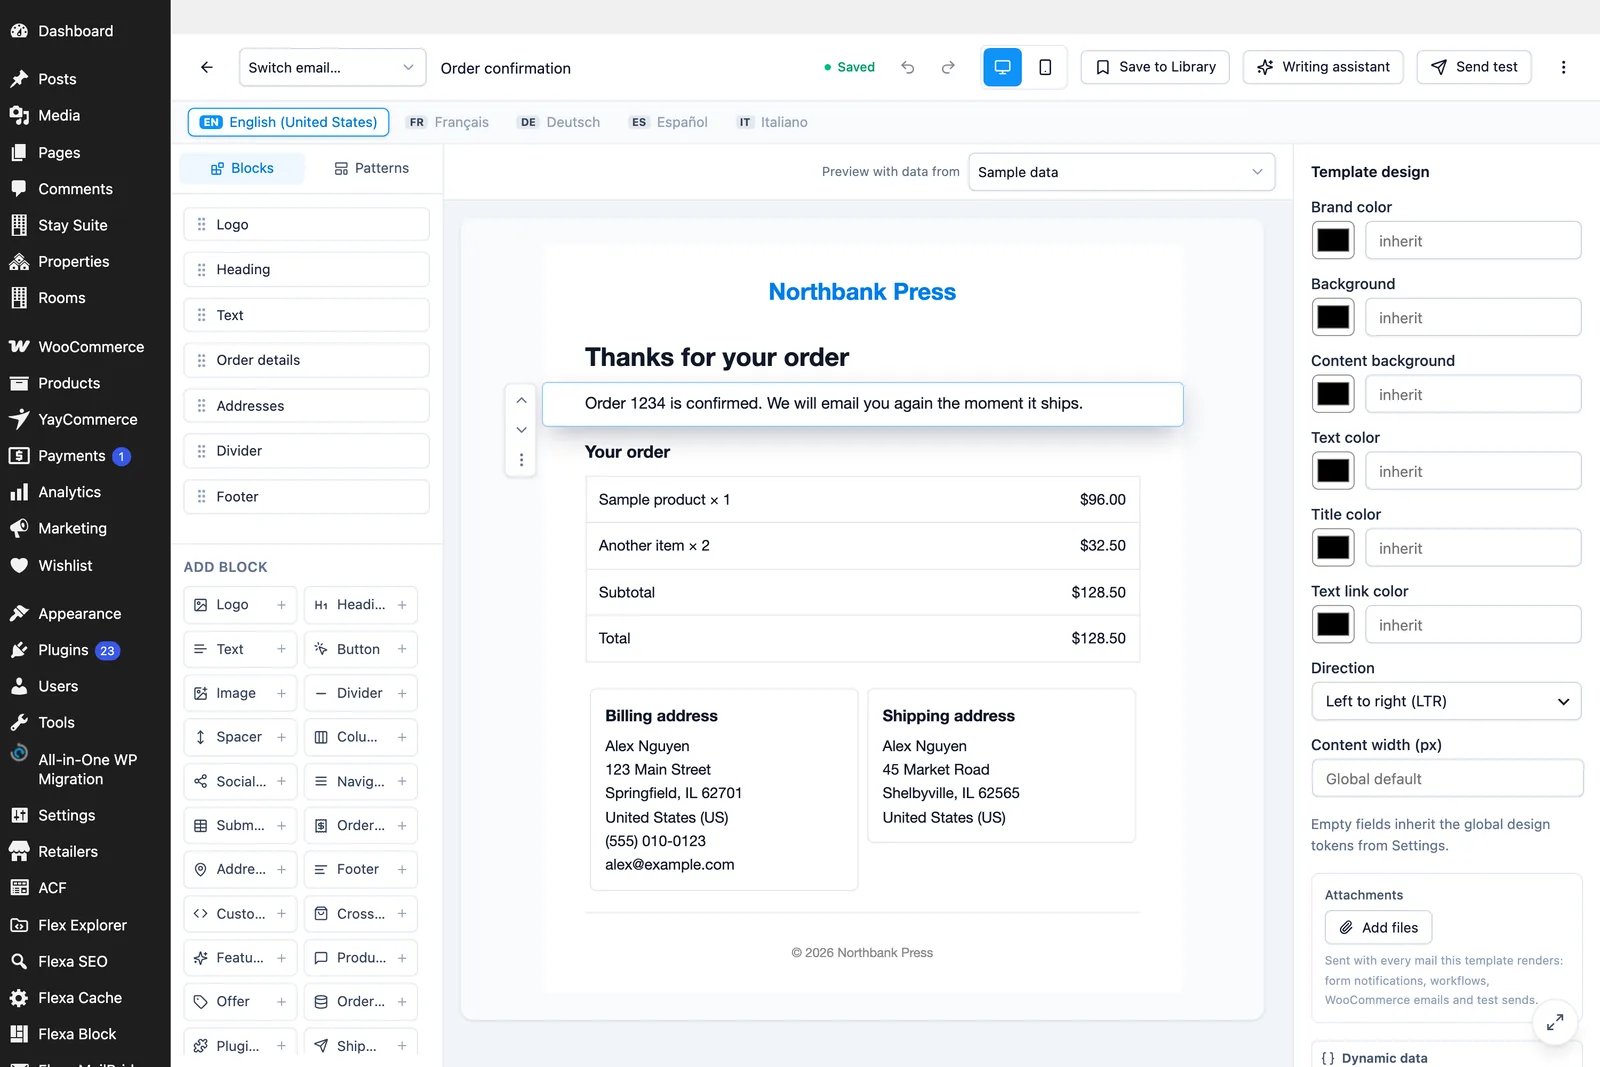
- Pick a Template. Default design keeps WooCommerce's layout; Customize copies that layout into a template of your own and opens it, after which the button reads Edit design.
- Preview renders the email against sample data or a real order (search by order number, name or email), at desktop or phone width, and can send a test to any address.
Taking it over does not switch it on
Order merge tags
Workflows
Workflows
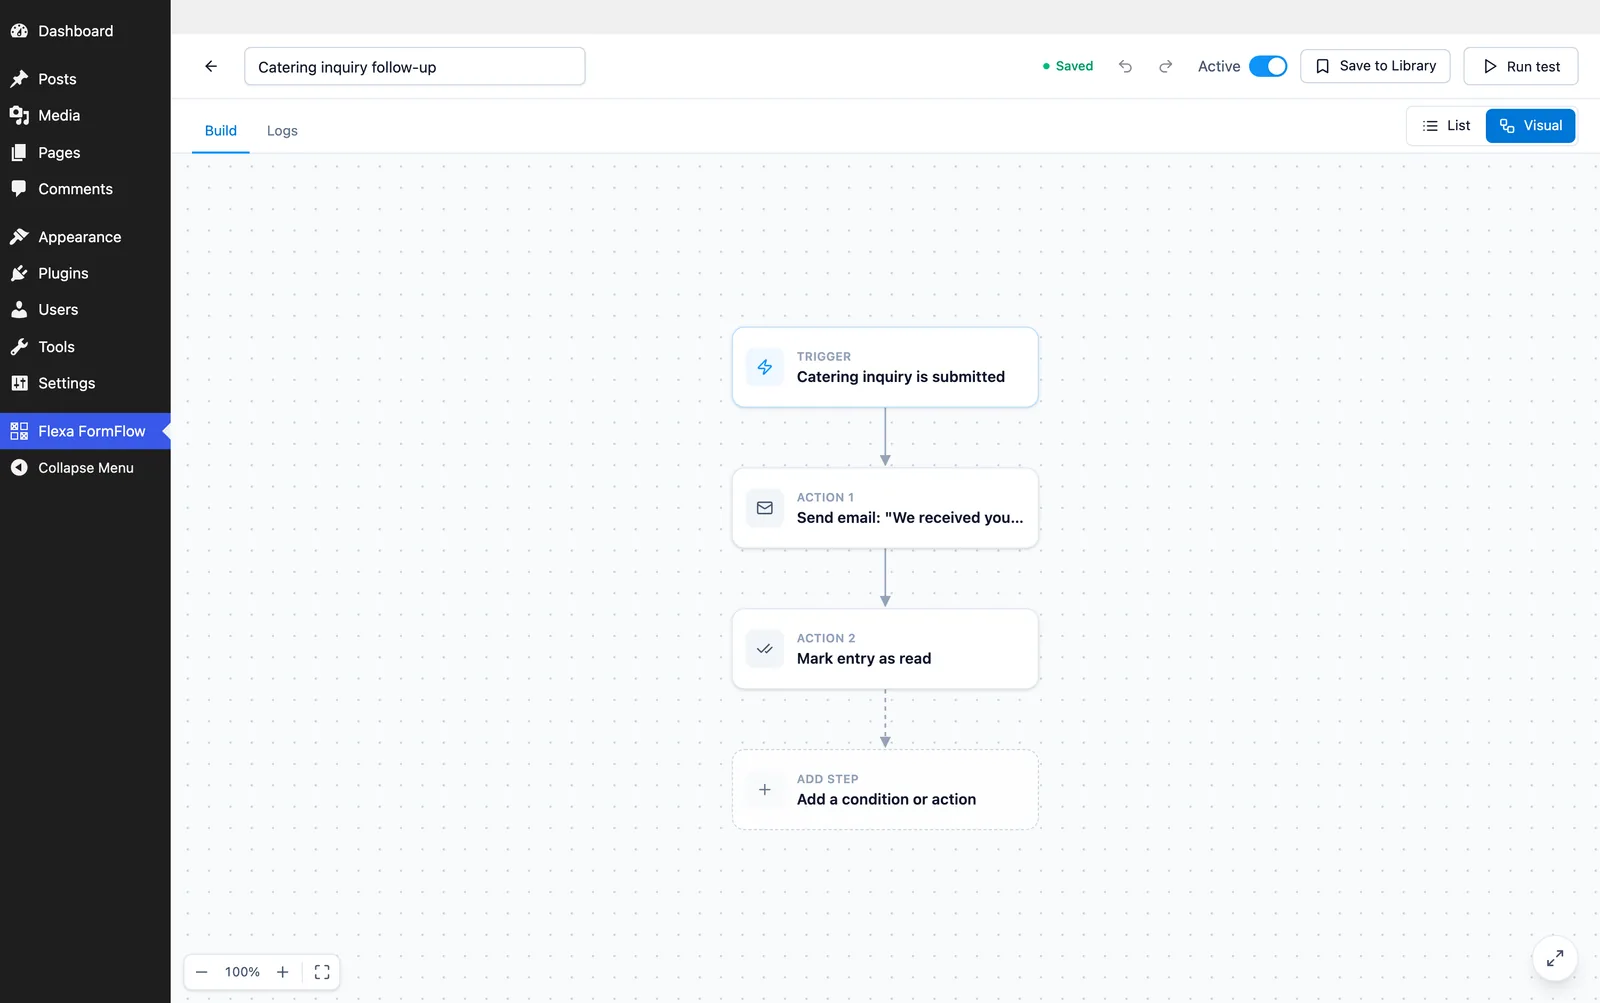
A workflow is a trigger, an optional gate, and a list of actions. It runs when a form is submitted, either any form or one you name.
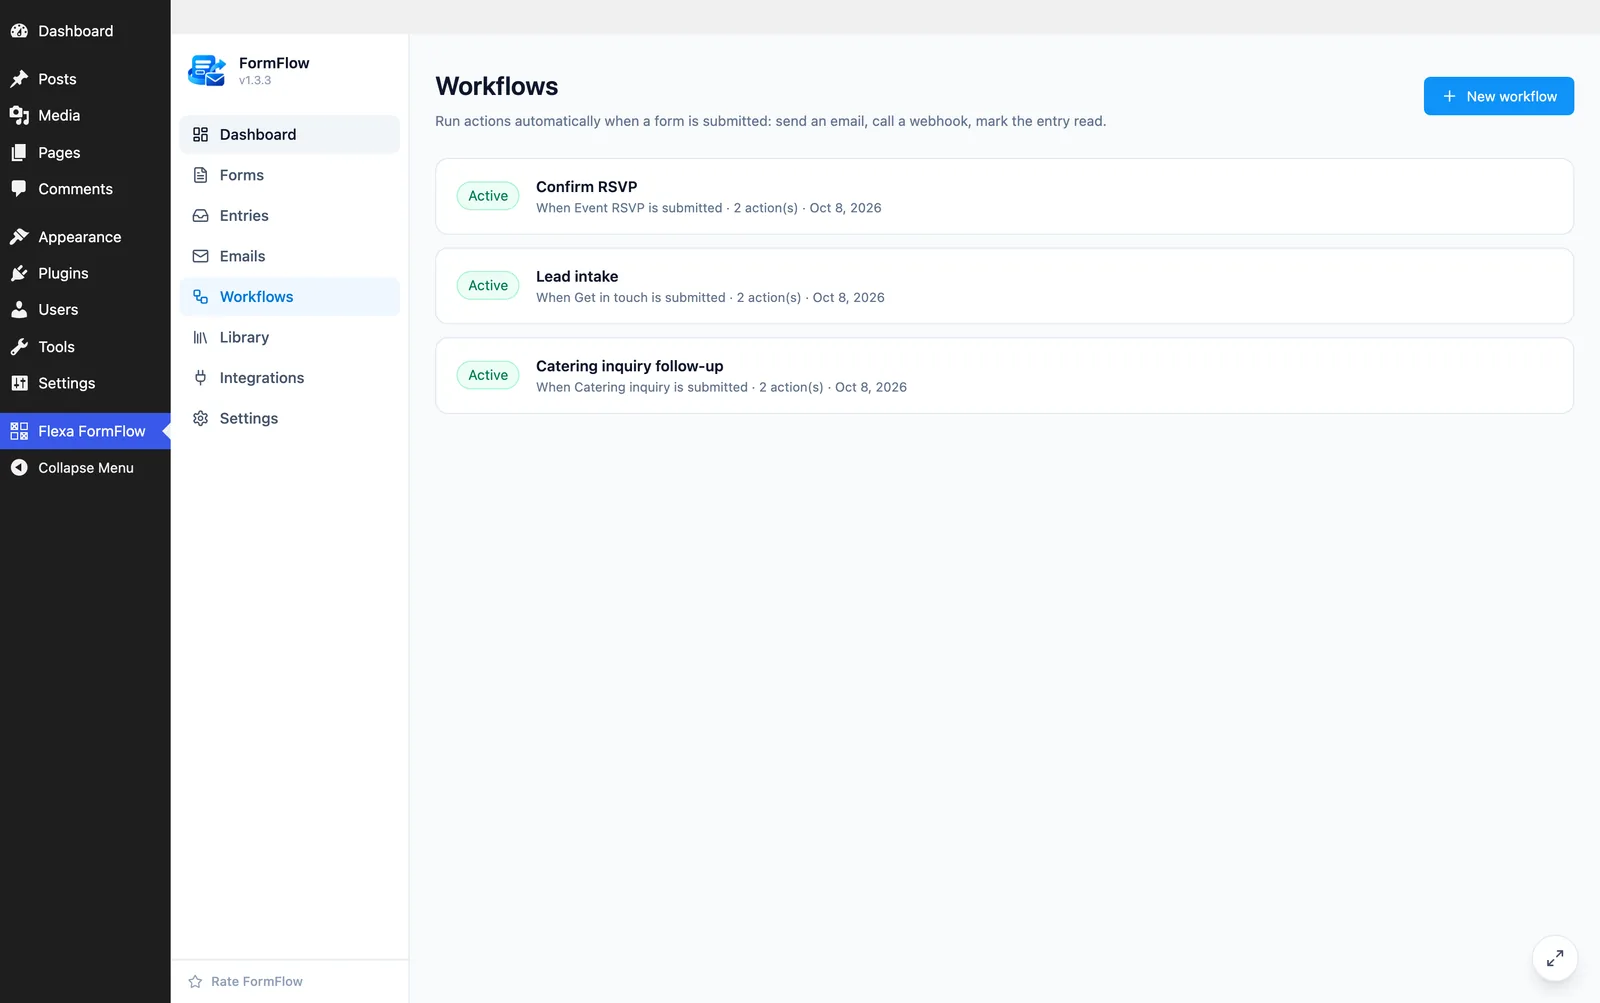
| Piece | Options |
|---|---|
| Trigger | A submission, from any form or from one specific form. |
| Gate | A condition with Then and Otherwise branches, or a Switch on one field with a case per value and a Default. |
| Actions | Send an email, send a webhook (POST with the entry as JSON), mark the entry read or unread, or add a note to it. |
The builder has two views over the same draft: a list, and a canvas where steps are nodes you can pan, zoom and fit to view, with settings in a side panel. Run test docks a panel beside the flow and reports every step, using the latest entry, a recent entry you pick, or values you type. A test saves nothing and sends no email.
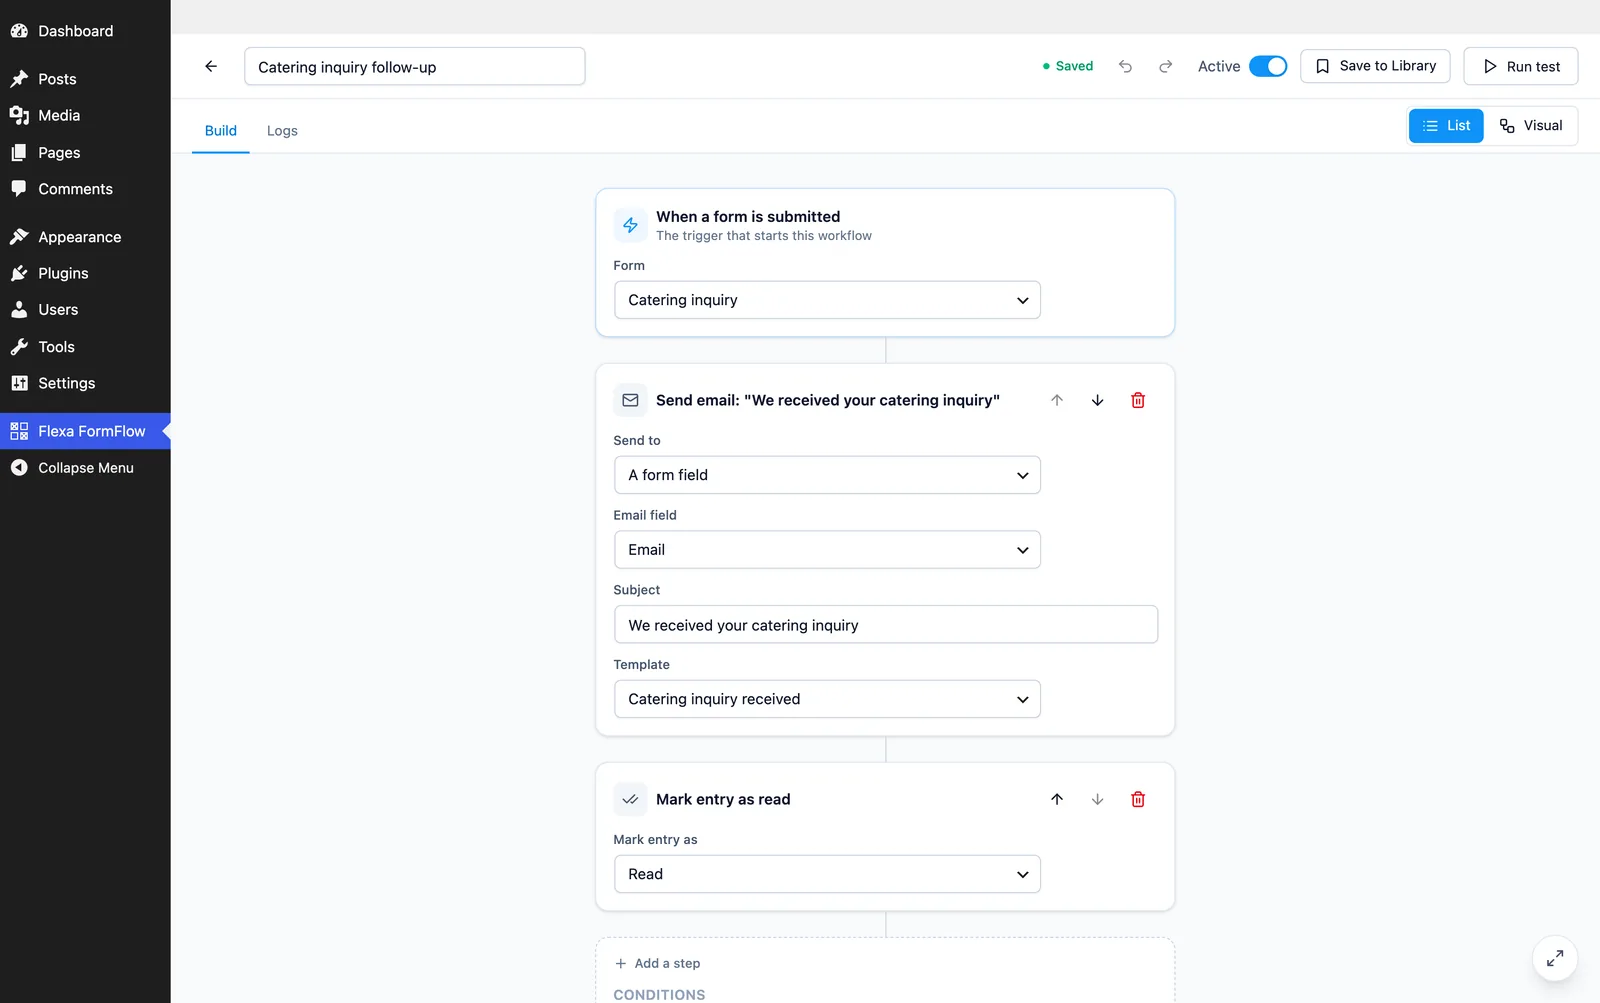
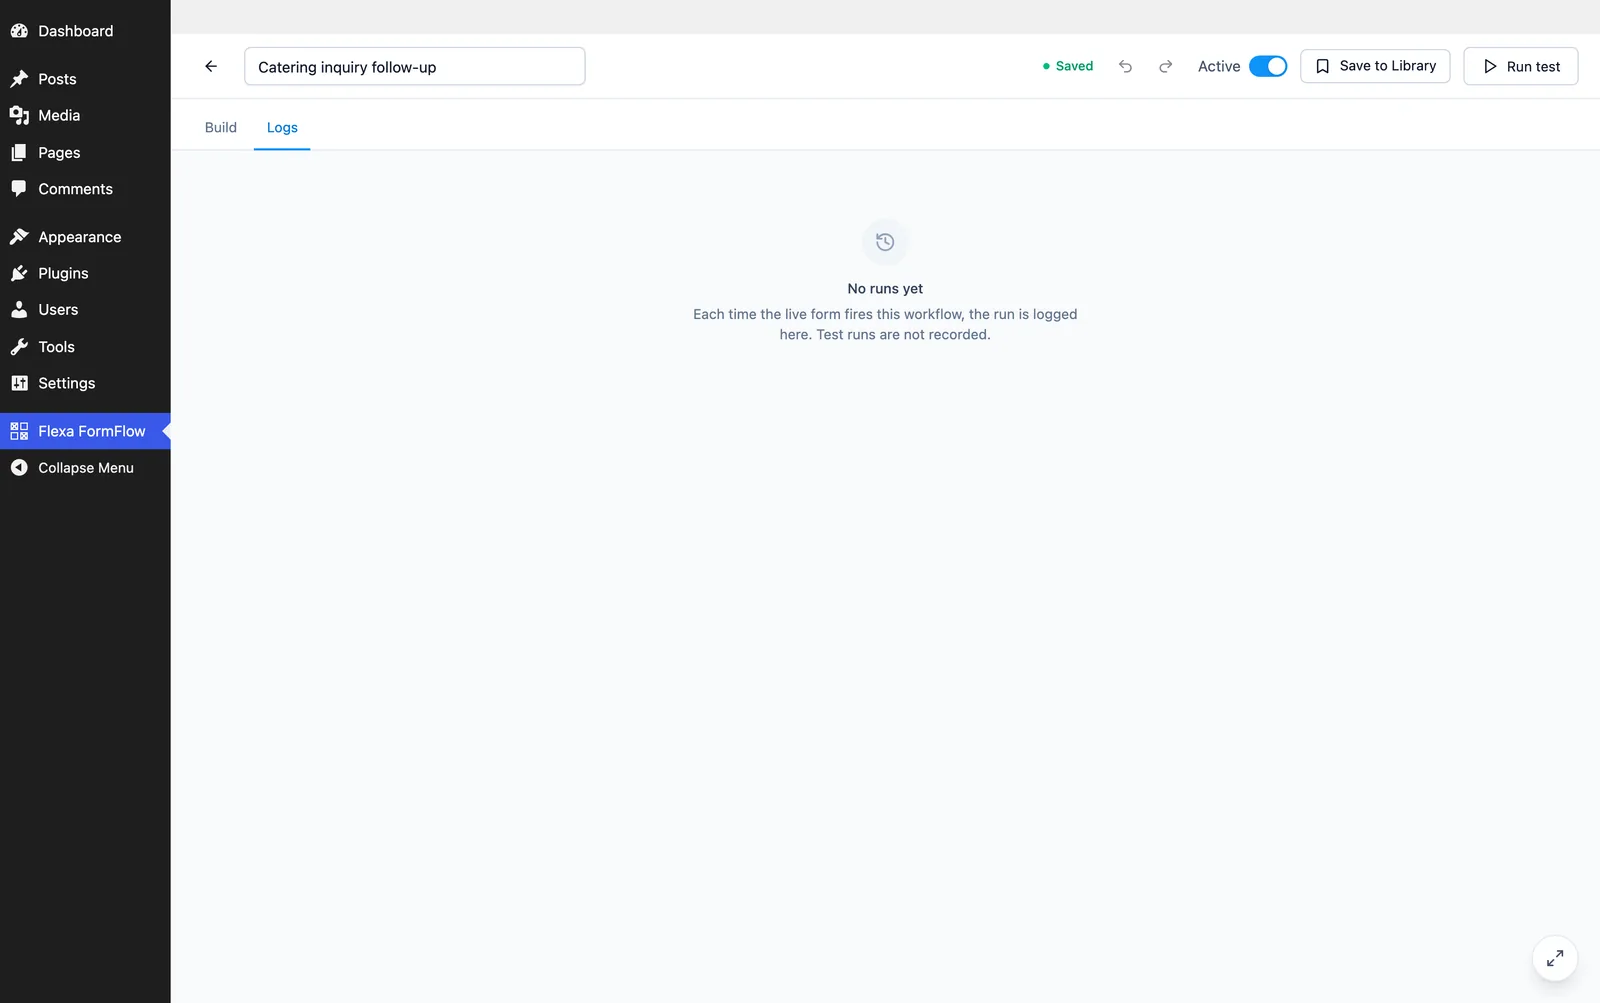
Each run is logged. The Logs tab shows the same per-step report the test panel gives, so a workflow that quietly skipped an action tells you which step decided that and why.
Webhooks go only where you point them
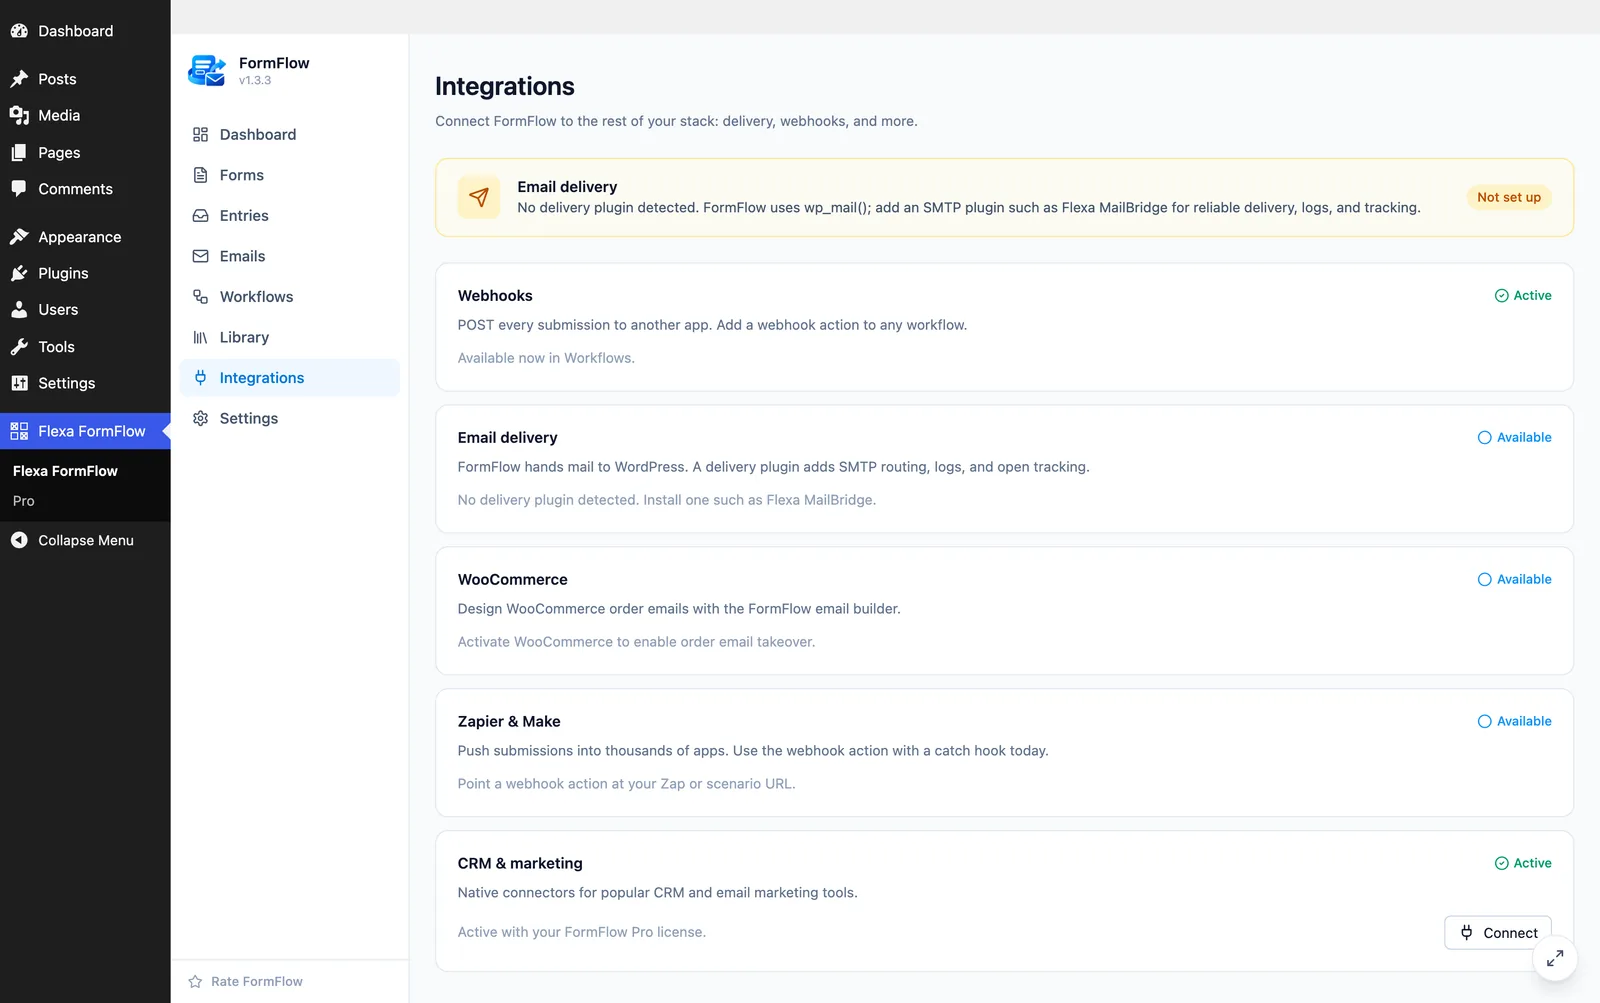
The Integrations screen is the map of what a workflow can reach. It shows what is already working (webhooks, and Zapier or Make through a catch hook), what is waiting on another plugin (SMTP delivery, WooCommerce), and what Pro adds (the CRM and marketing connectors).
Library
Library and packs
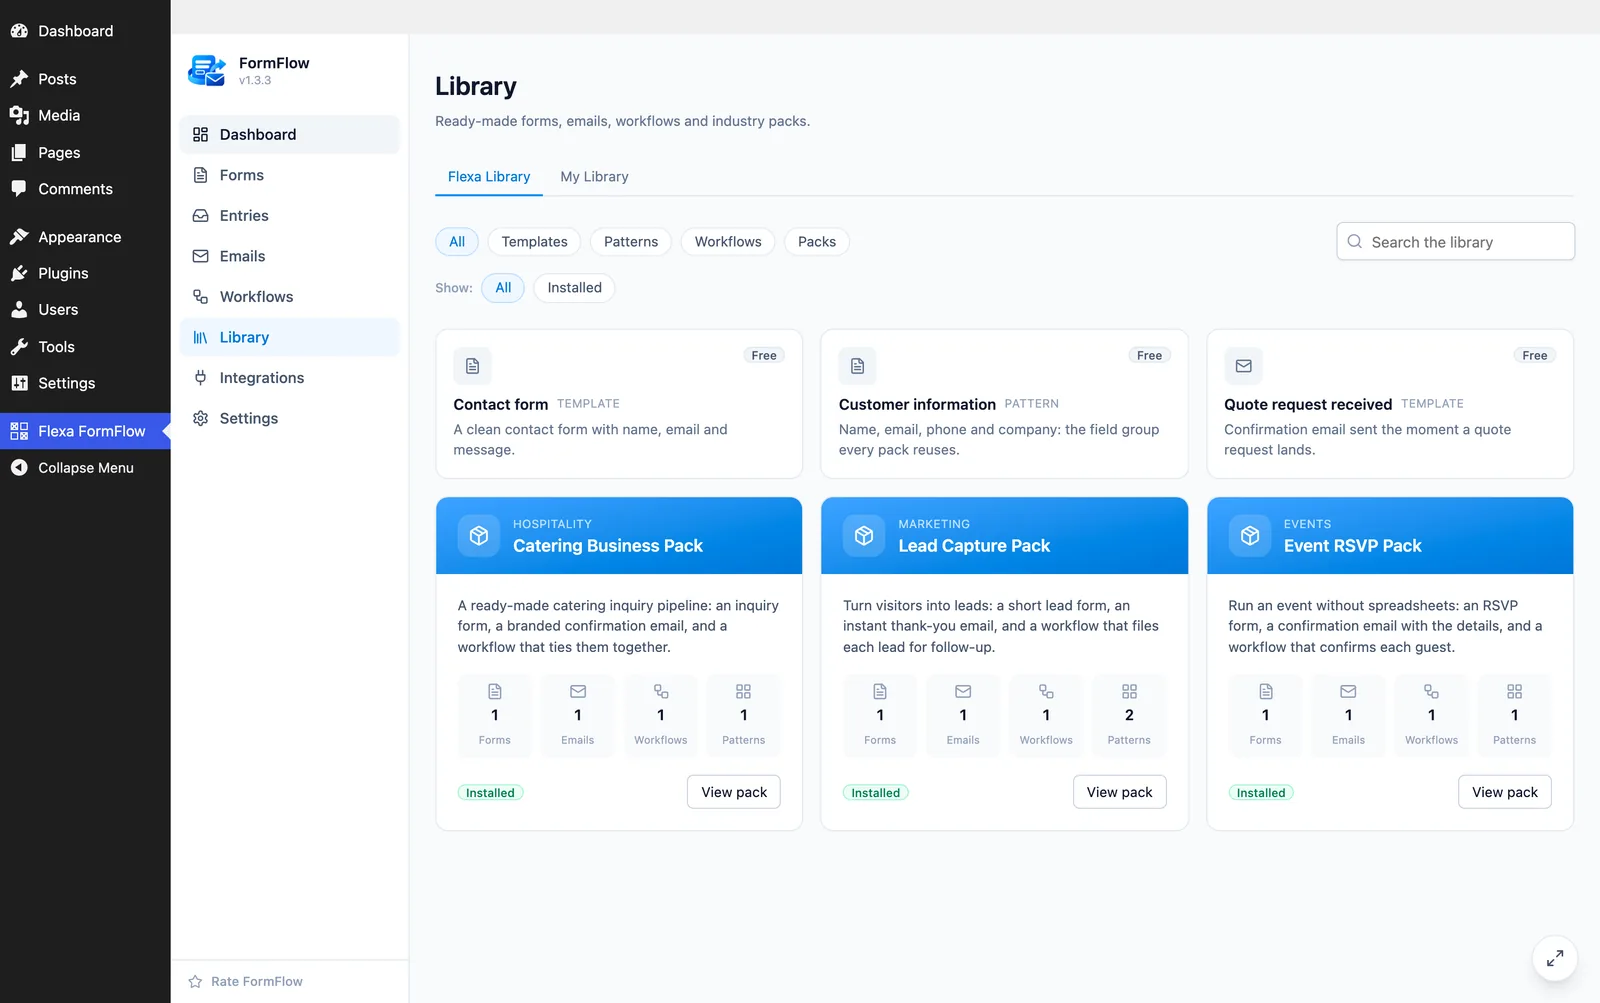
The Library has two halves: a catalog of ready-made content, and the items you saved yourself.
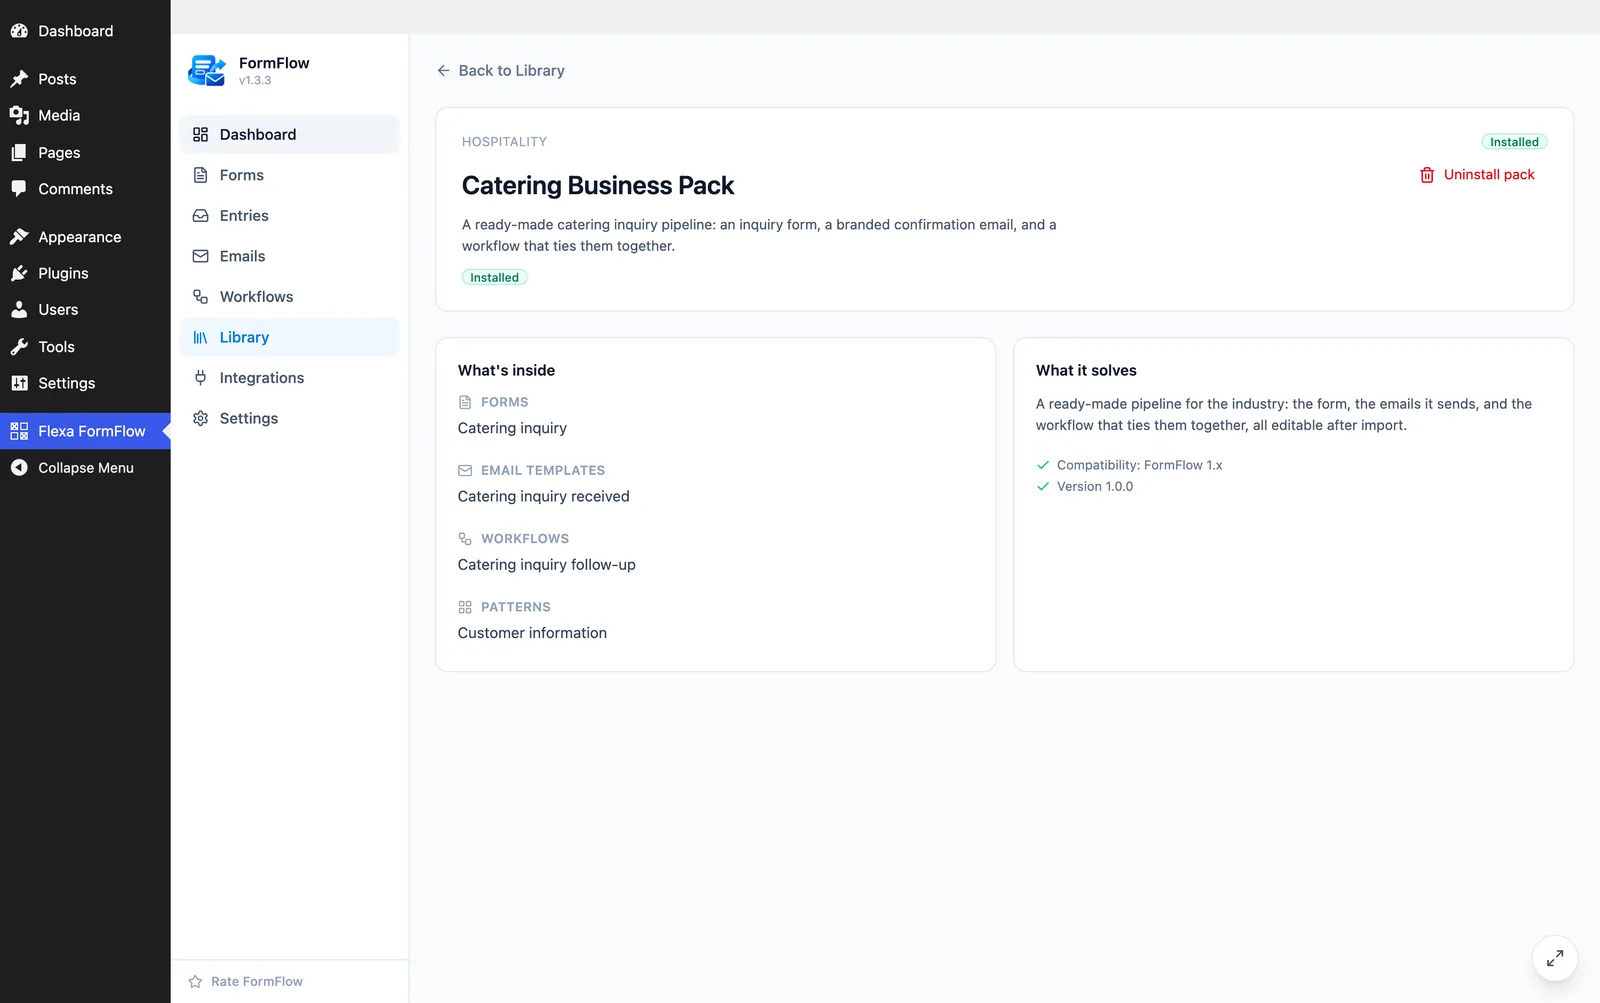
A pack installs a set of related items at once: forms, email templates and workflows for a trade or a use case. A pack's detail page reports any of its installed items you have since deleted and offers to put back only those, leaving the rest of the pack alone.
Settings
AI assistant
Optional, off until you add a key, and never used on the front end.
Choose a provider in Settings (Anthropic, OpenAI or Google Gemini) and paste an API key. The key is stored encrypted and is never shown in the browser again. A request leaves your site only when you click an AI tool in the builder:
- Generate a form sends the description you typed.
- Writing assistant (rewrite, shorten, change tone, subject ideas) sends the text you asked it to work on, the tone you picked, and your site name.
No visitor data, entries or submitted values are sent, and there is no FormFlow server in between: the request goes from your site straight to the provider with your own key.
Settings
Settings
| Setting | What it controls |
|---|---|
| Brand color | The accent every email template starts from. Default #0f92f7. |
| Page and content background, text color | The canvas of the emails you send. |
| Font family, content width | Email typography and the width of the content column (600px by default). |
| Footer text | The line at the bottom of emails. Tokens work here, for example © {year} {site_title}. |
| Spam protection | CAPTCHA provider keys, stored encrypted, with a test button. |
| AI provider | Provider, model and API key for the AI tools. |
| Delete data on uninstall | Off by default. See the FAQ below. |
Ready for more?
Pro keeps everything on this page and adds multi-step forms, synced blocks, email variables, color themes, PDF attachments, per-language emails, a CRM, and email blocks that pull data from your other plugins.
Help
Troubleshooting and FAQ
No email arrives
FormFlow hands the message to wp_mail(). If other WordPress mail (a password reset, for instance) also fails, the problem is delivery, not FormFlow: install an SMTP or delivery plugin. If other mail arrives and FormFlow's does not, open the form's settings and check that the notification is enabled and has a recipient, then use the editor's test send.
A visitor says the form will not submit
Check the CAPTCHA first: a published form set to a provider with no keys shows a challenge nobody can pass, and the Dashboard flags it. After that, look for a required field hidden by a show/hide rule.
A token prints raw in an email
A token that has no value is left empty rather than printed, so raw text in a sent email usually means a typo in the token name. Insert tokens from the Dynamic data list instead of typing them.
Where are submissions stored?
In your own database, in the plugin's own tables. Nothing is sent to a third party. The technical reference lists the tables.
What happens when I uninstall?
Nothing is removed unless you turn on Delete data on uninstall in Settings first. With it off, your forms, entries and templates survive a reinstall.
Does it need WooCommerce?
No. WooCommerce only adds the store-specific blocks and the WooCommerce email designs.